
I have owned my 2004 Chevy Colorado for 10 yrs and 172,000 miles. It’s been a good truck with no major issues. I am looking forward to the new 2015 Colorado with the 4 cyl Diesel engine when I finally retire this old truck. Something that has always bothered me about mine but never been a huge issue is the A/C in this truck. It works and keeps me comfortable however riding in other cars their A/C can freeze you right out if you want it to. My A/C seems to have to work extra hard on really hot 90+ days to stay cool and will never freeze you out. Like I said it works but not like other cars I ride in.
Anyways, I did some reading online and this is a common complaint on the Chevy Colorado’s lacking in their A/C. I read a post in the www.coloradofans.com where one guy added a 150K Ohm resistor to the Evap coil sensor and it drastically changed the A/C output. It makes sense since the evap sensor is a simple thermistor most likely. Adding a resistor in parallel will change the sensor resistance to the computer and give it a different reading. The sensor is located behind the glove box so it sounded like an easy mod.
I tried this mod and was shocked at the results! My A/C vent temperature went from 50° F down to 40° F on a 85° F day. That’s a huge change and it will freeze me right out of the cab now. I documented exactly what I did below. Remember, modify at your own risk. I am not responsible if you wreck your A/C system.
Items you need for this mod:
- Soldering Iron
- Solder
- one 150K ohm – 200K ohm resistor
- 2 small flat screw drivers
- pliers
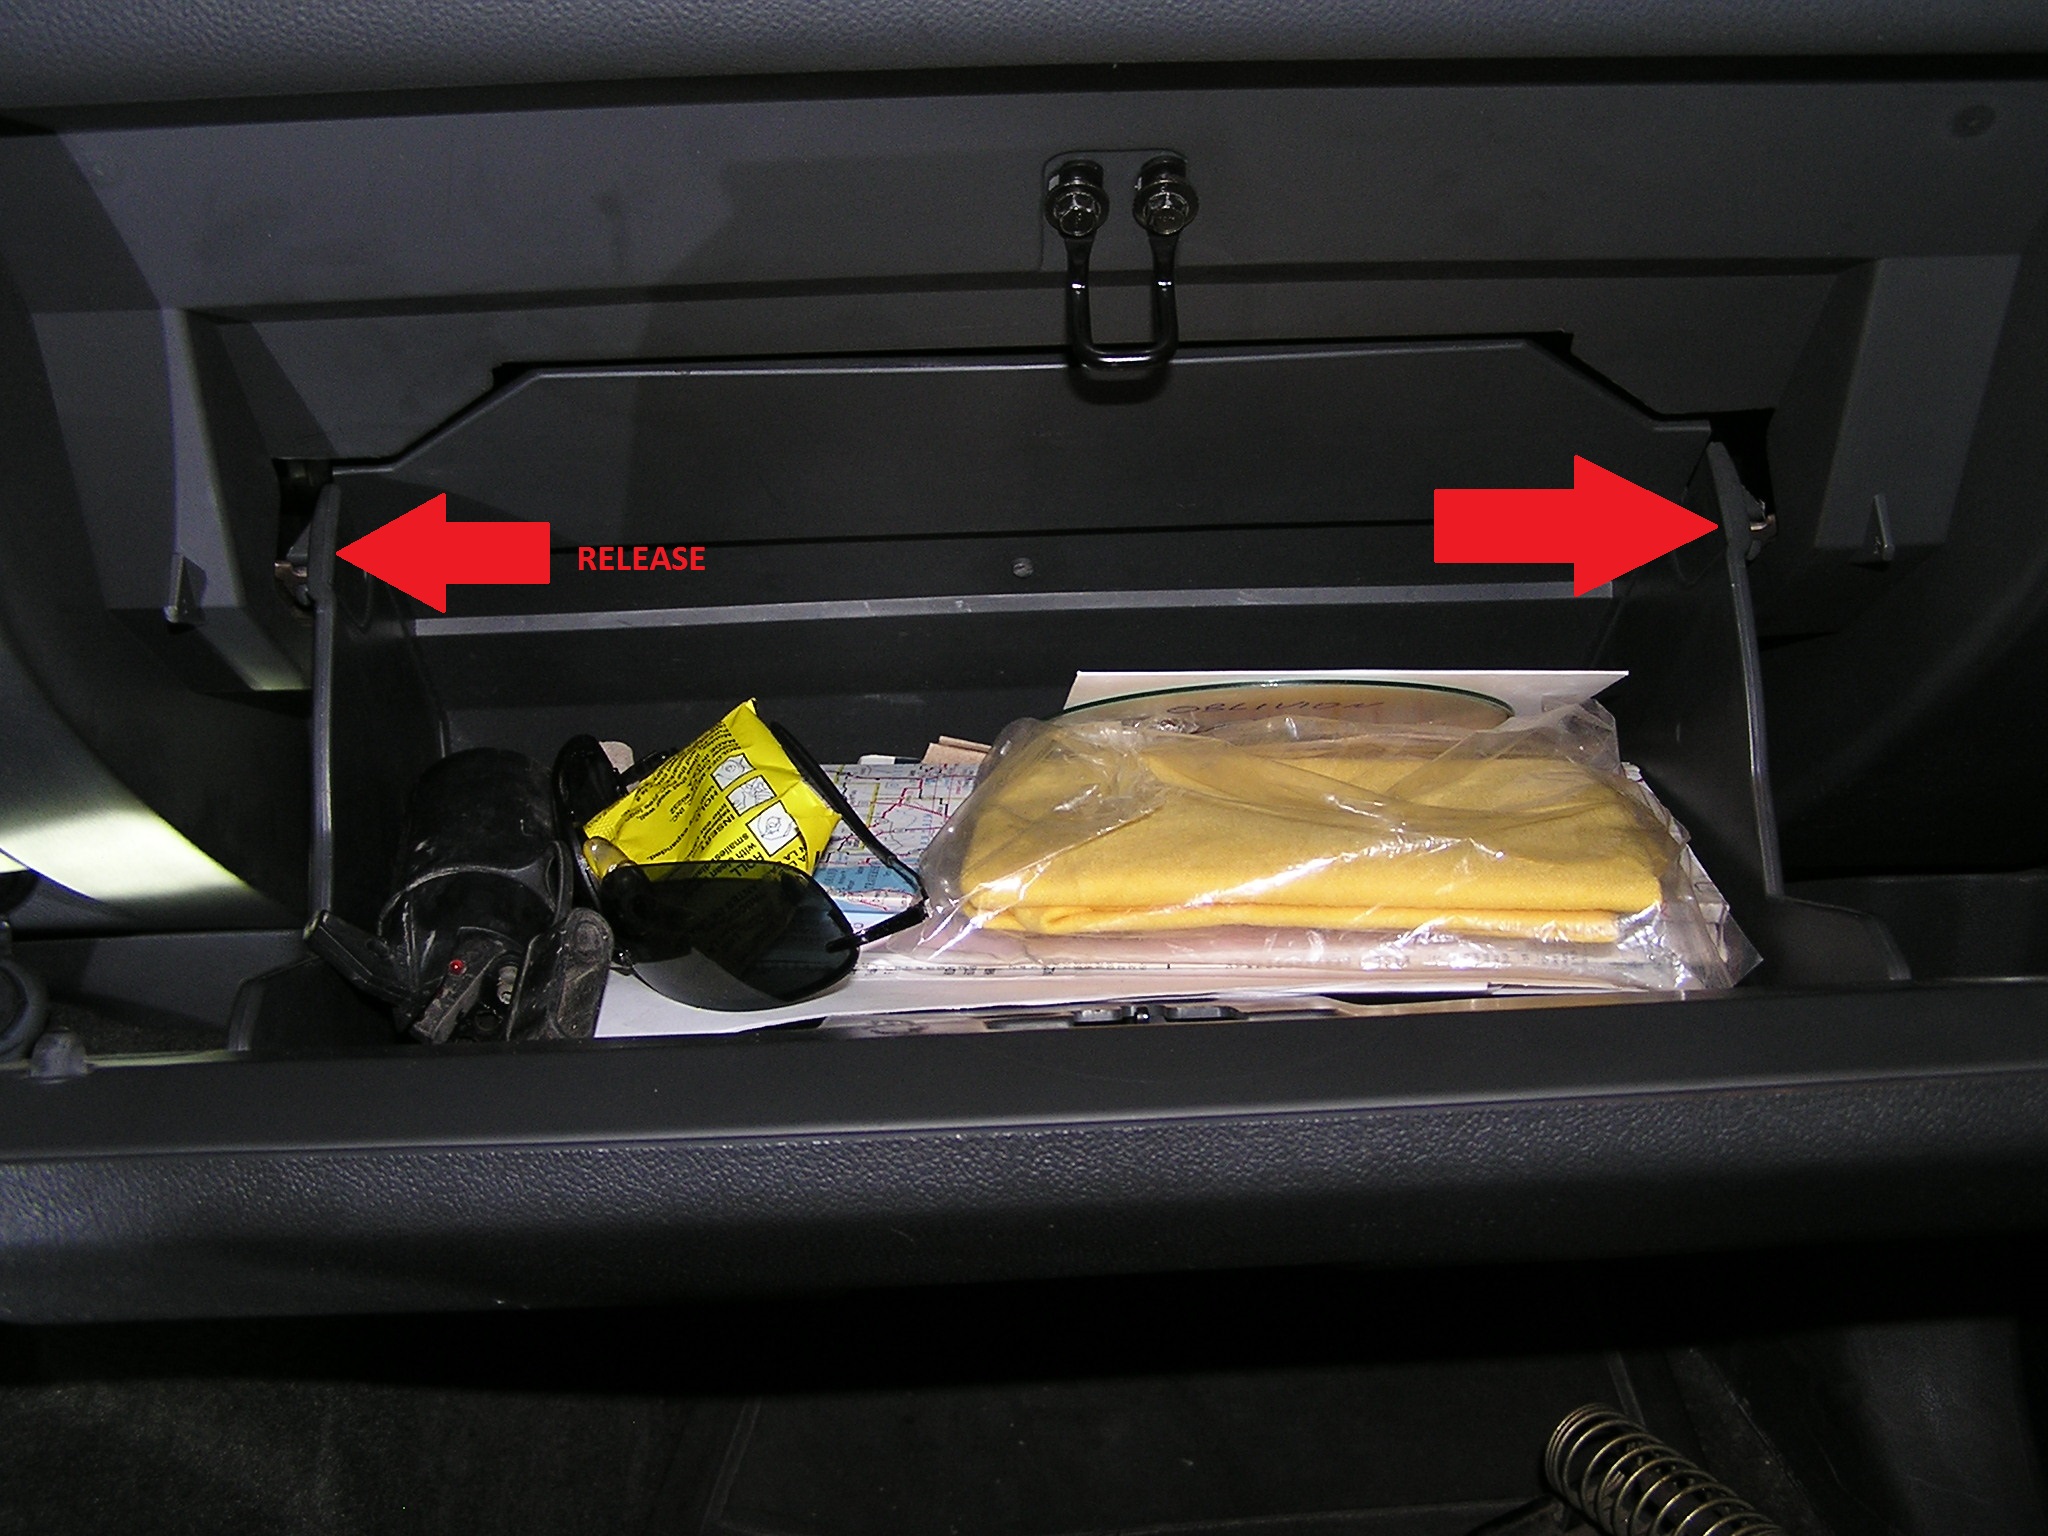
The first thing you need to do is remove the glove box. This is simple and all you have to do is pry the two tabs with your fingers on the sides to get the glove box to release.
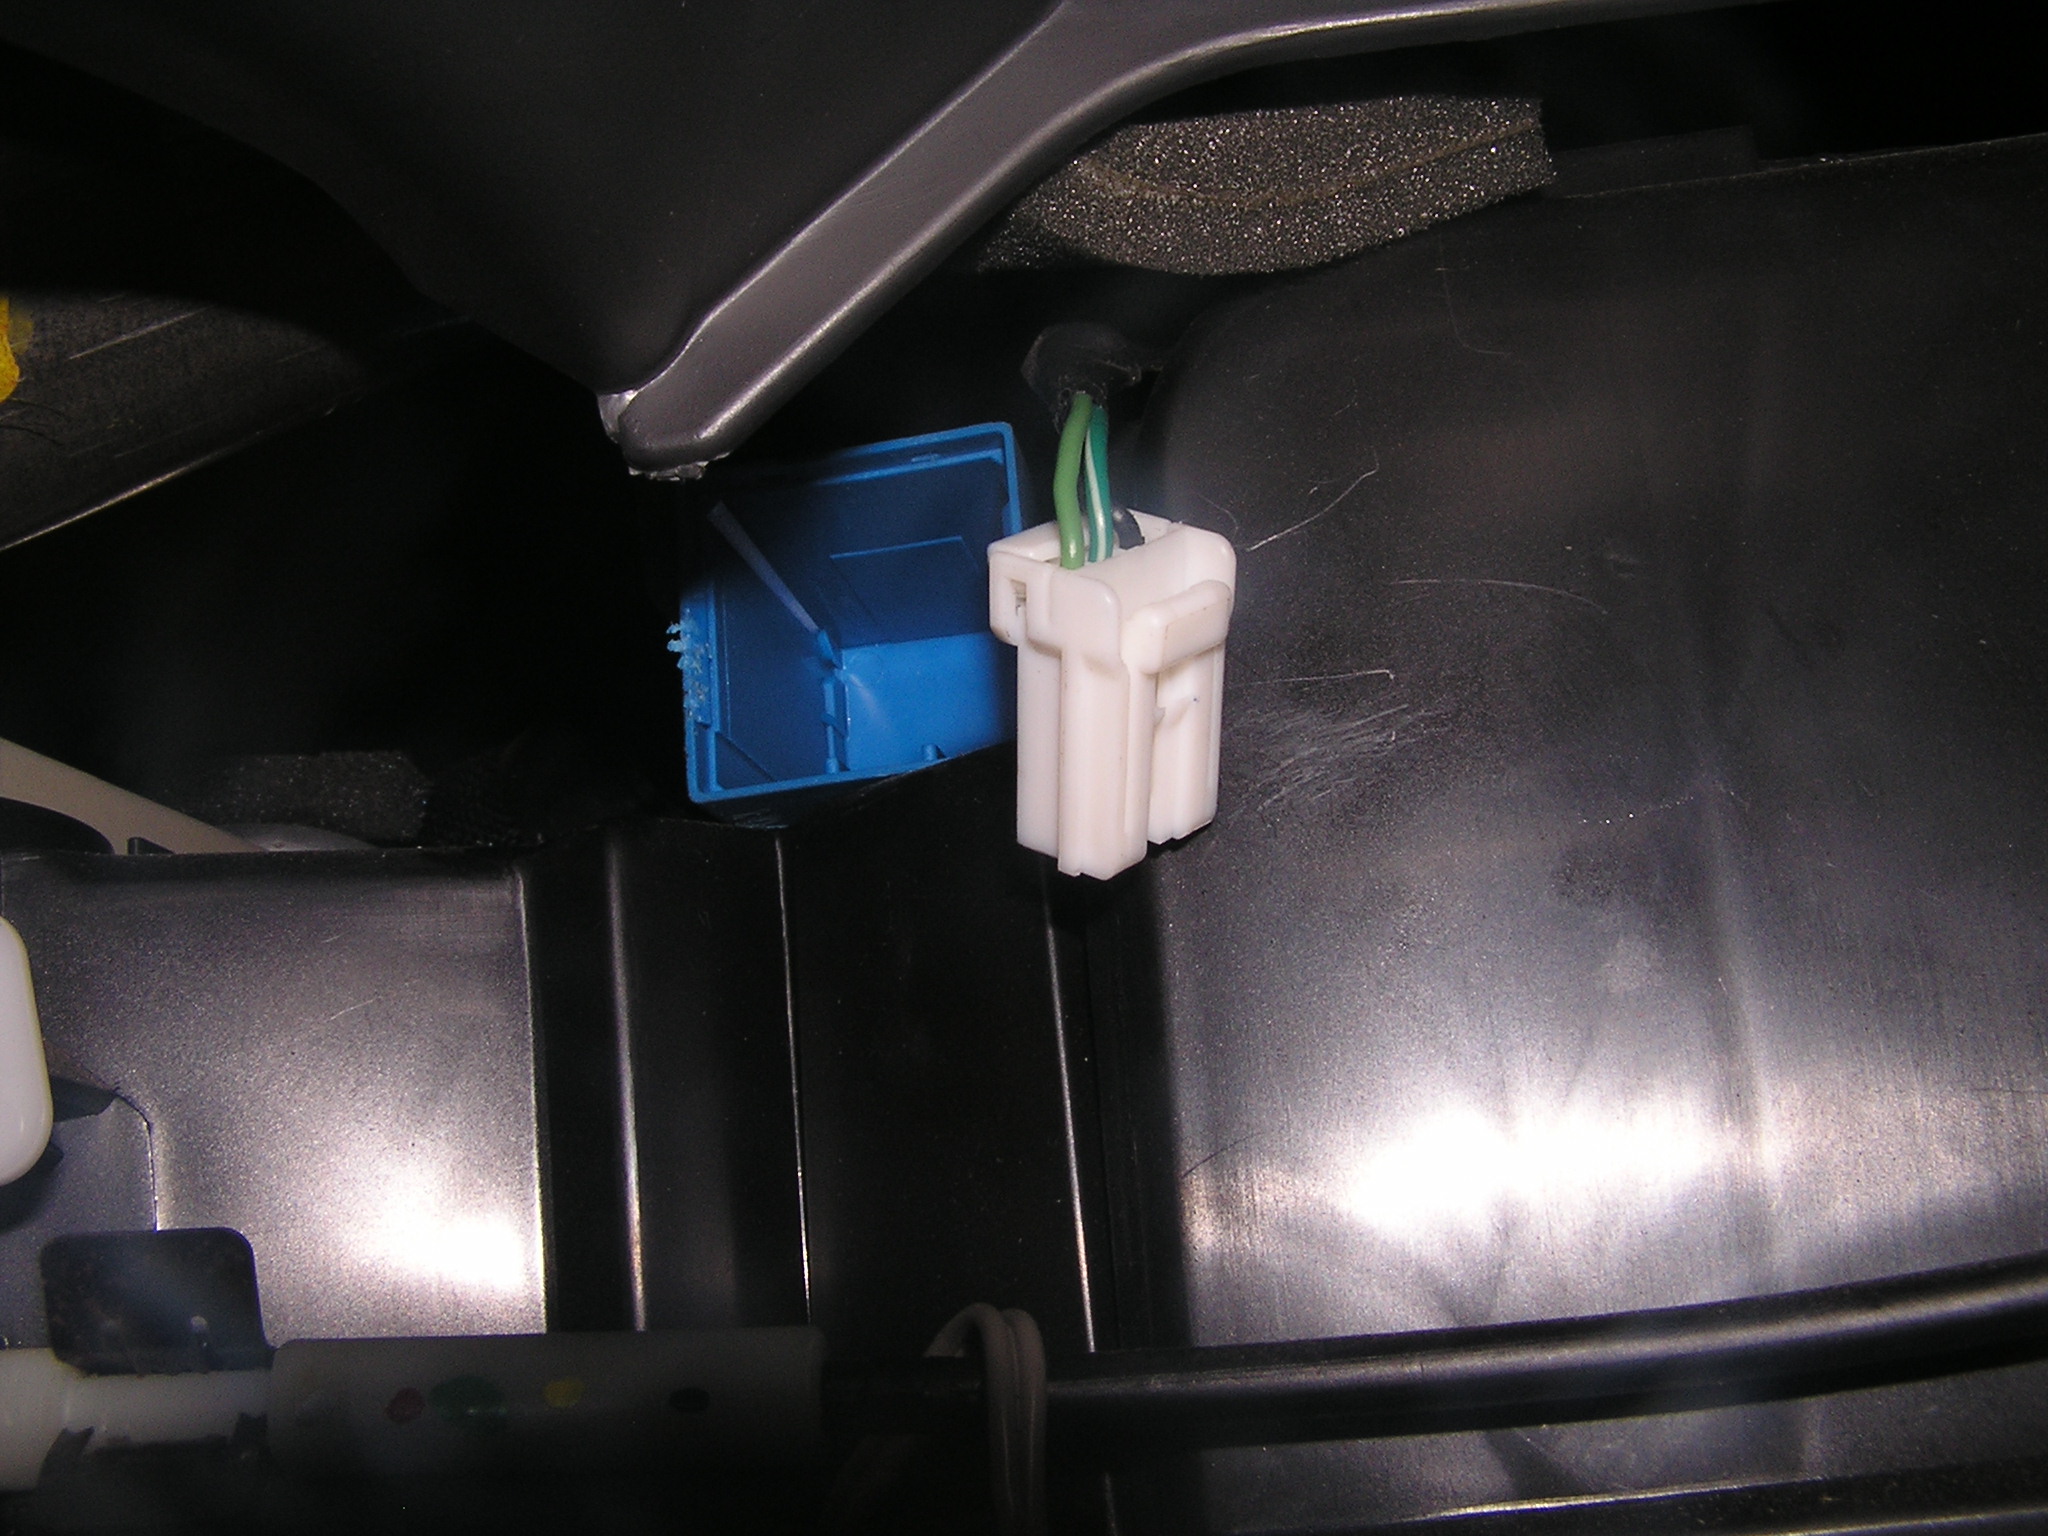
Next you have to locate the control box which is near the top left corner.
Next, remove the green wire plug and use the screw drivers to pry between the blue box and the white bottom (where the plug was ) to release the circuit board.
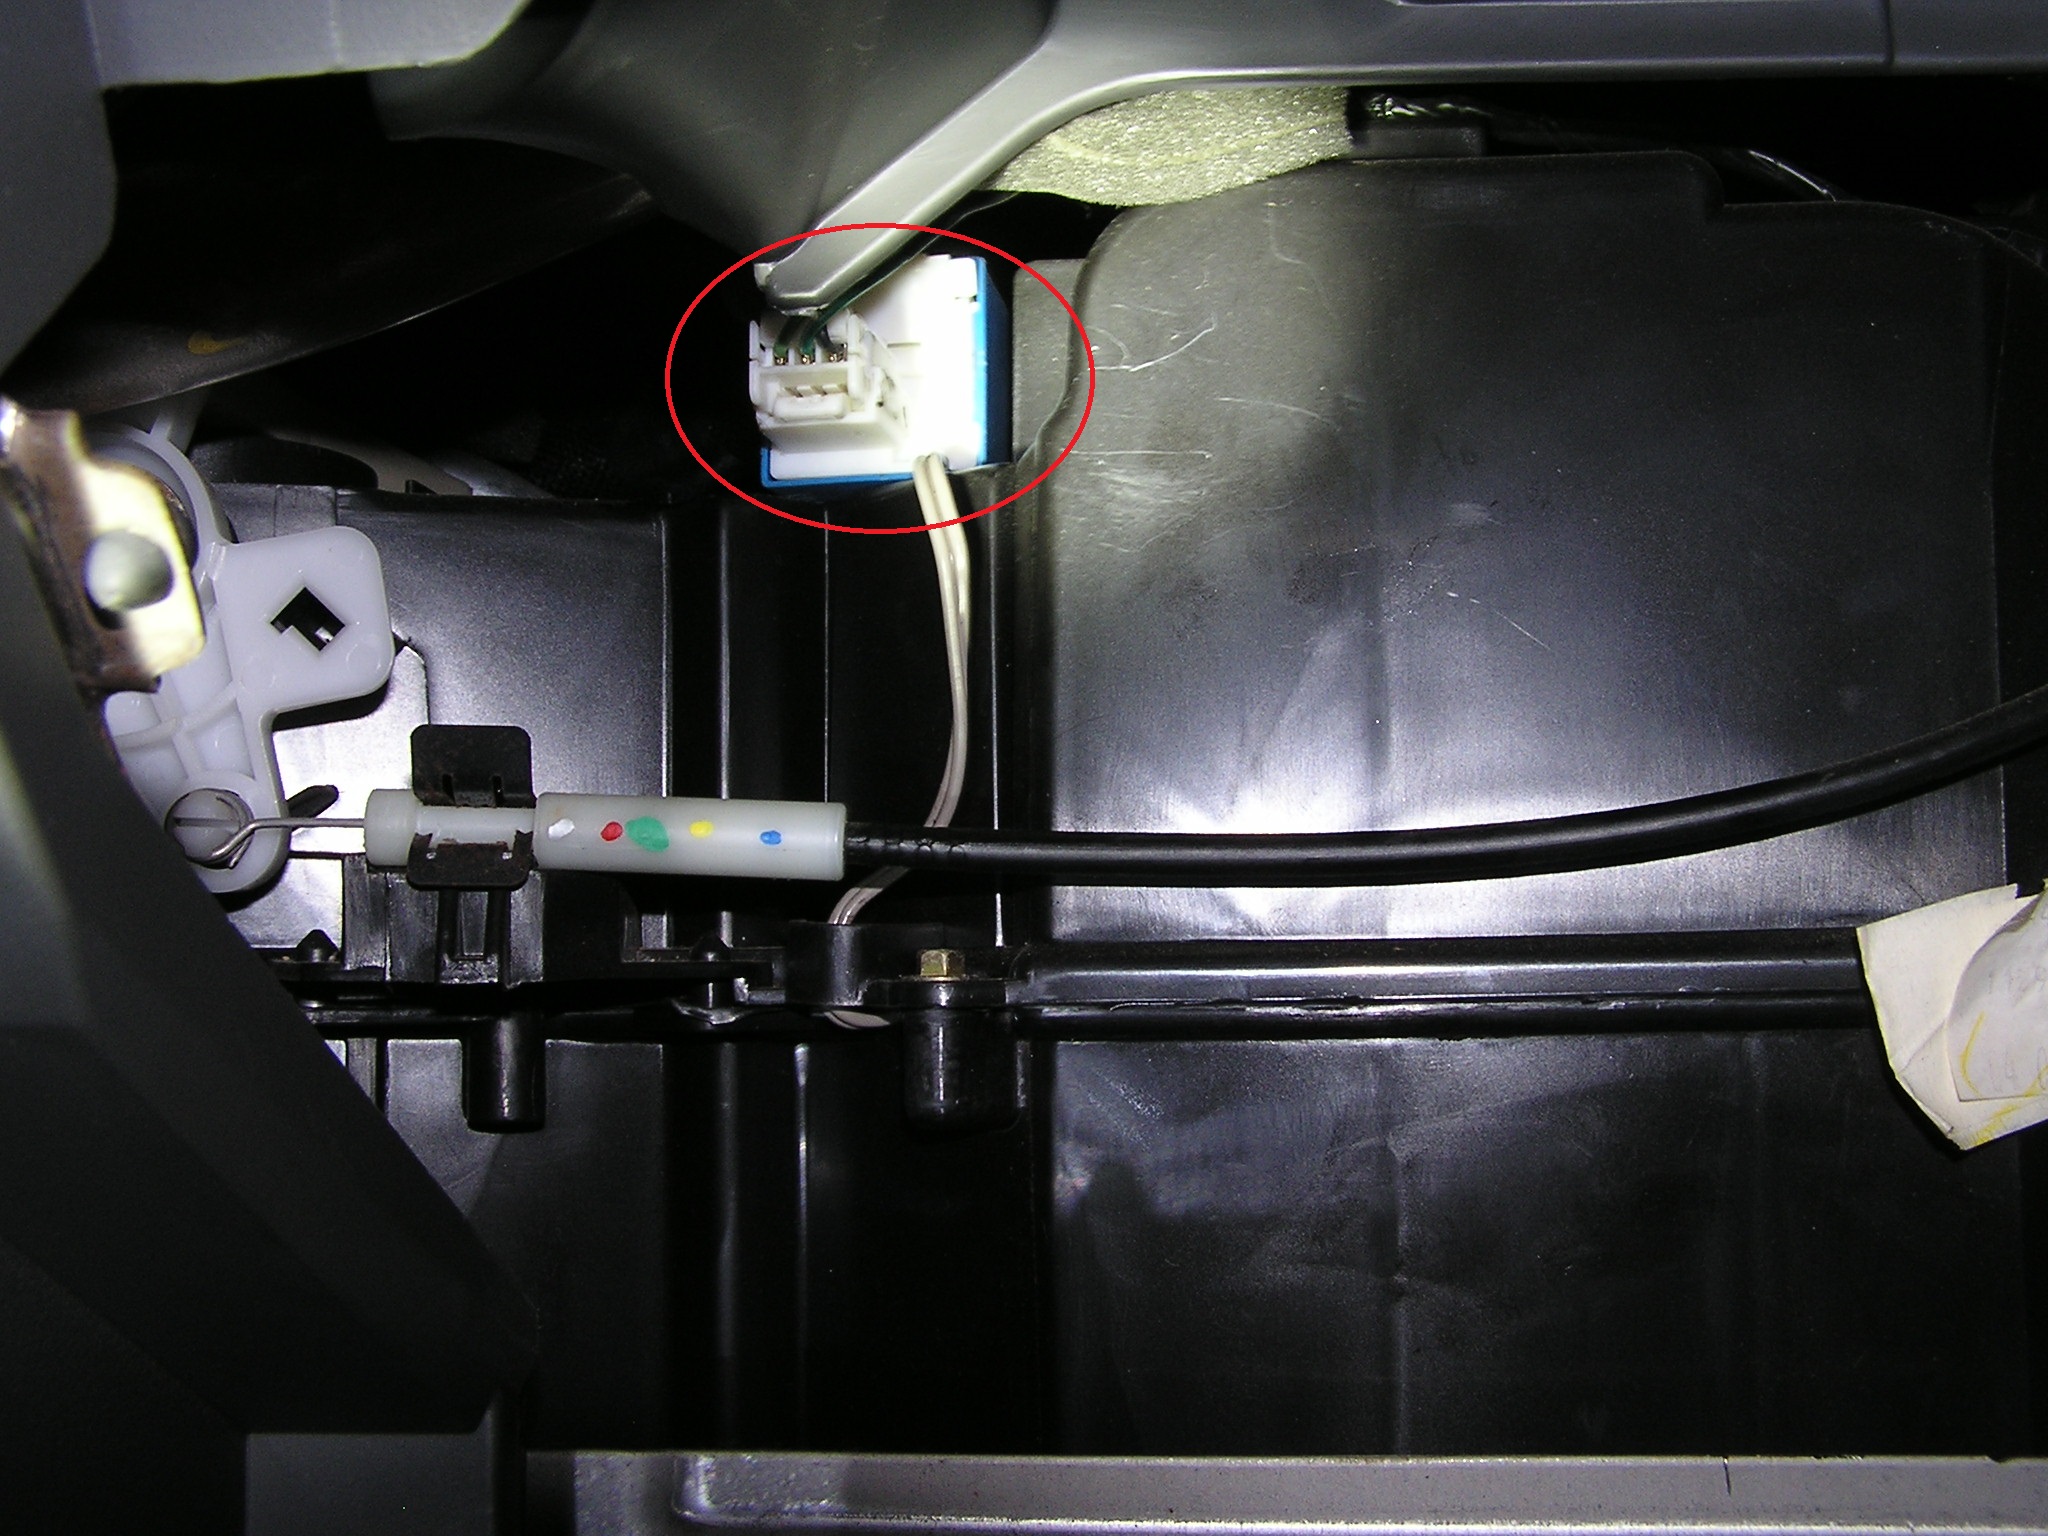
This can be tricky so take your time and do not break it. I used the pliers to tug on the white part while I gently pried on the blue box.
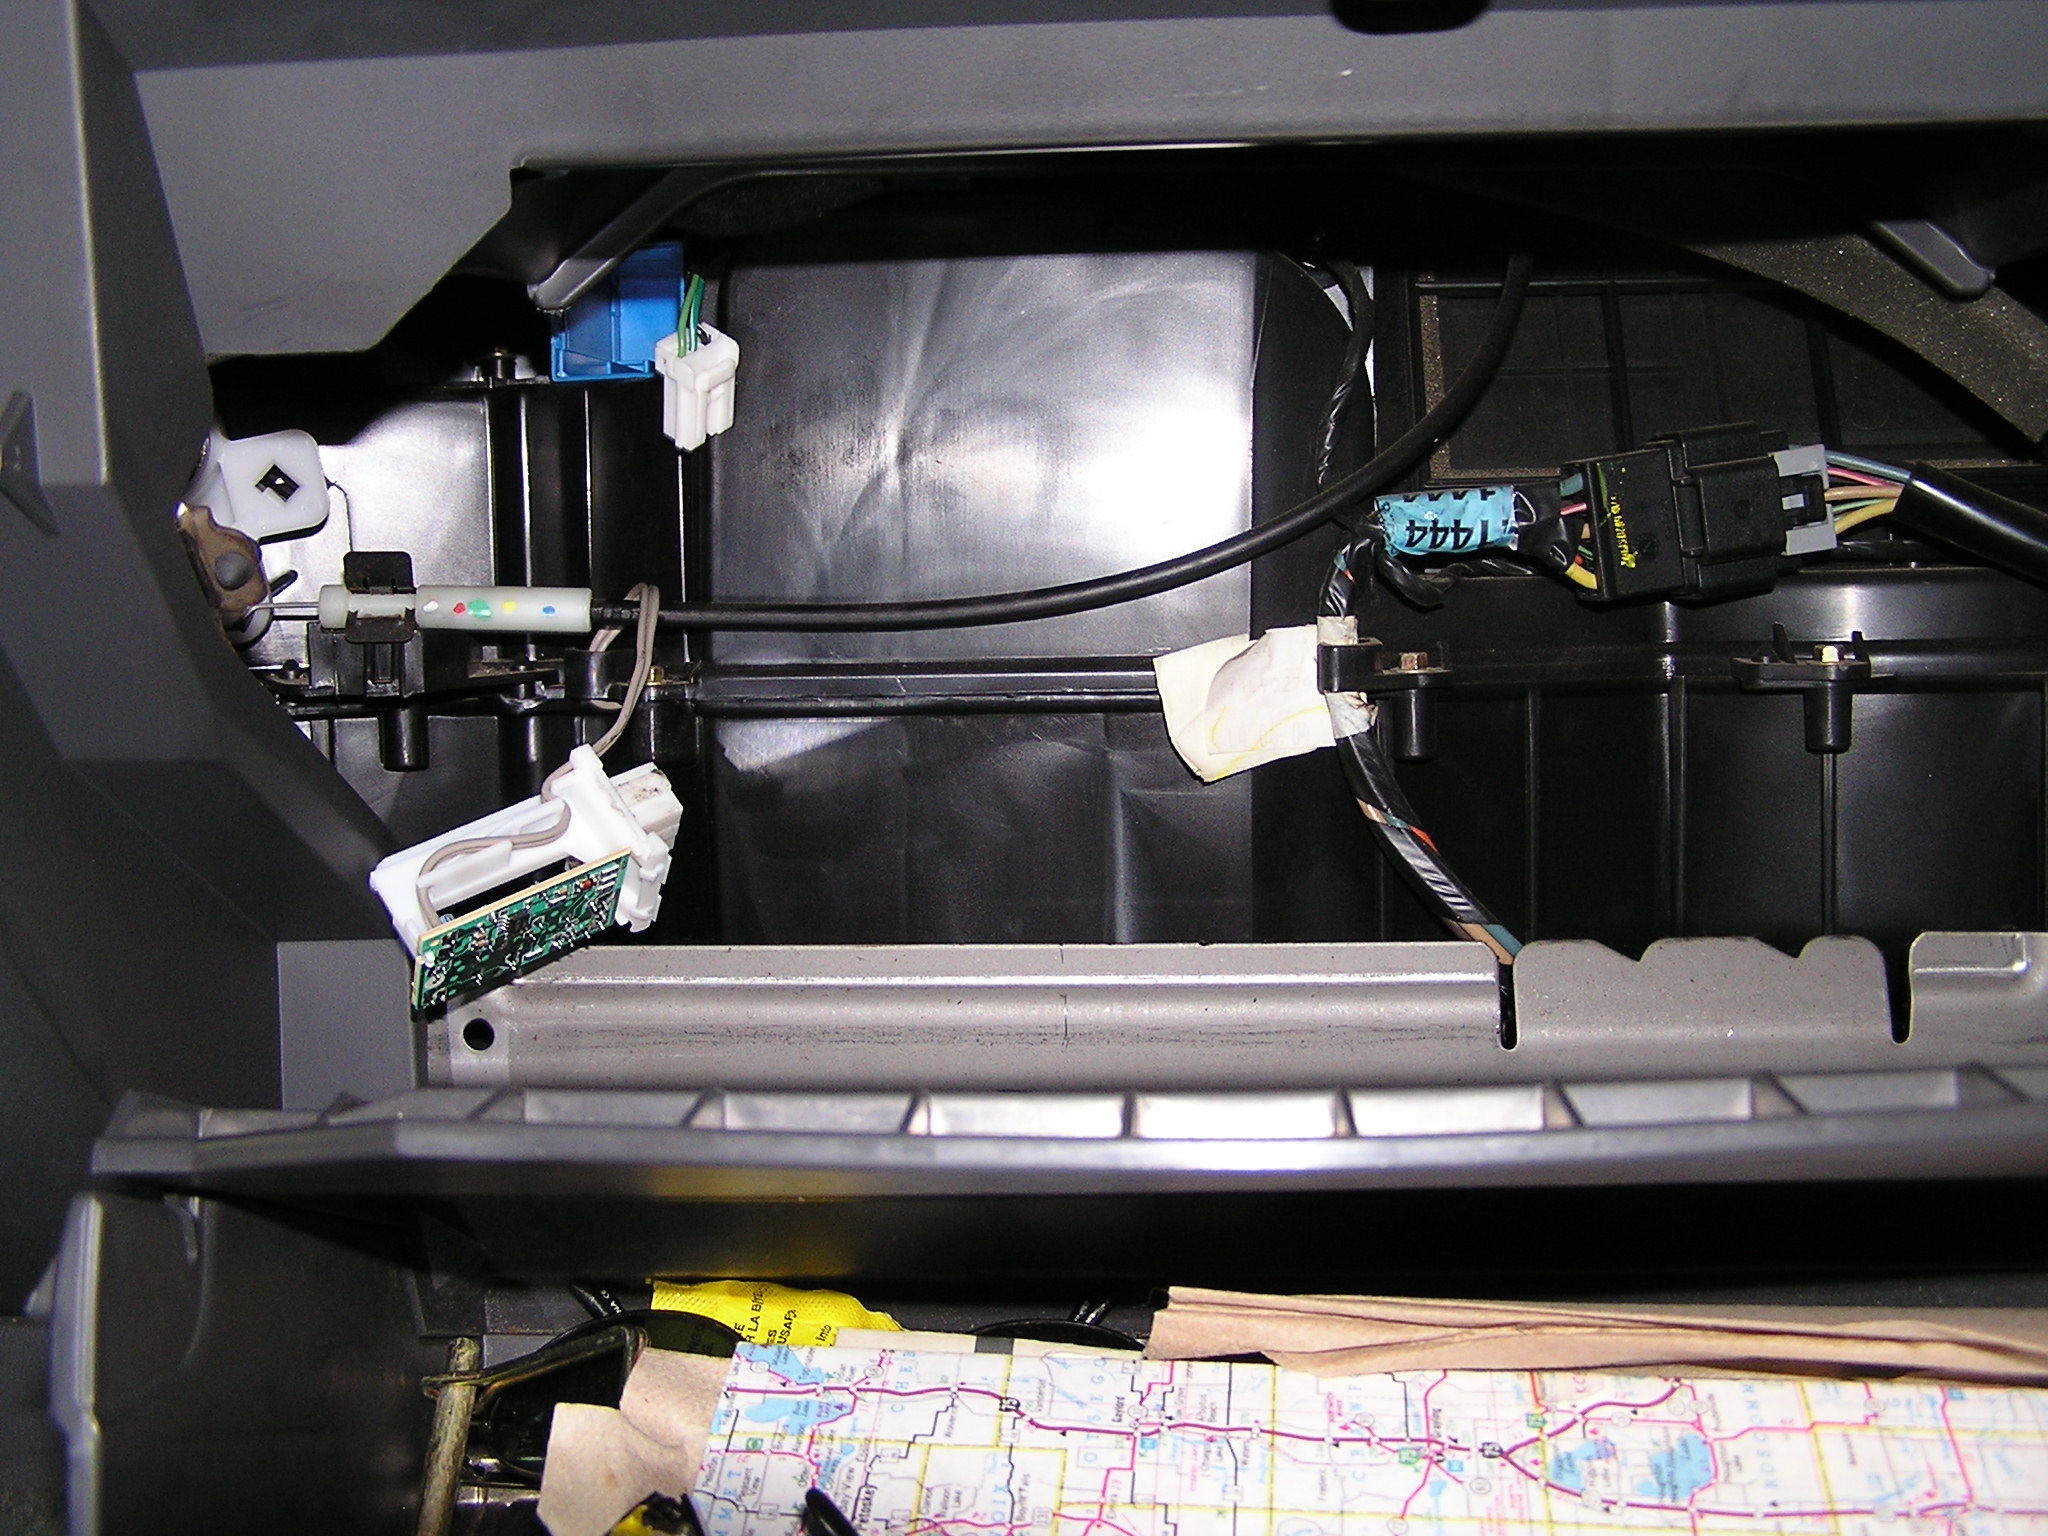
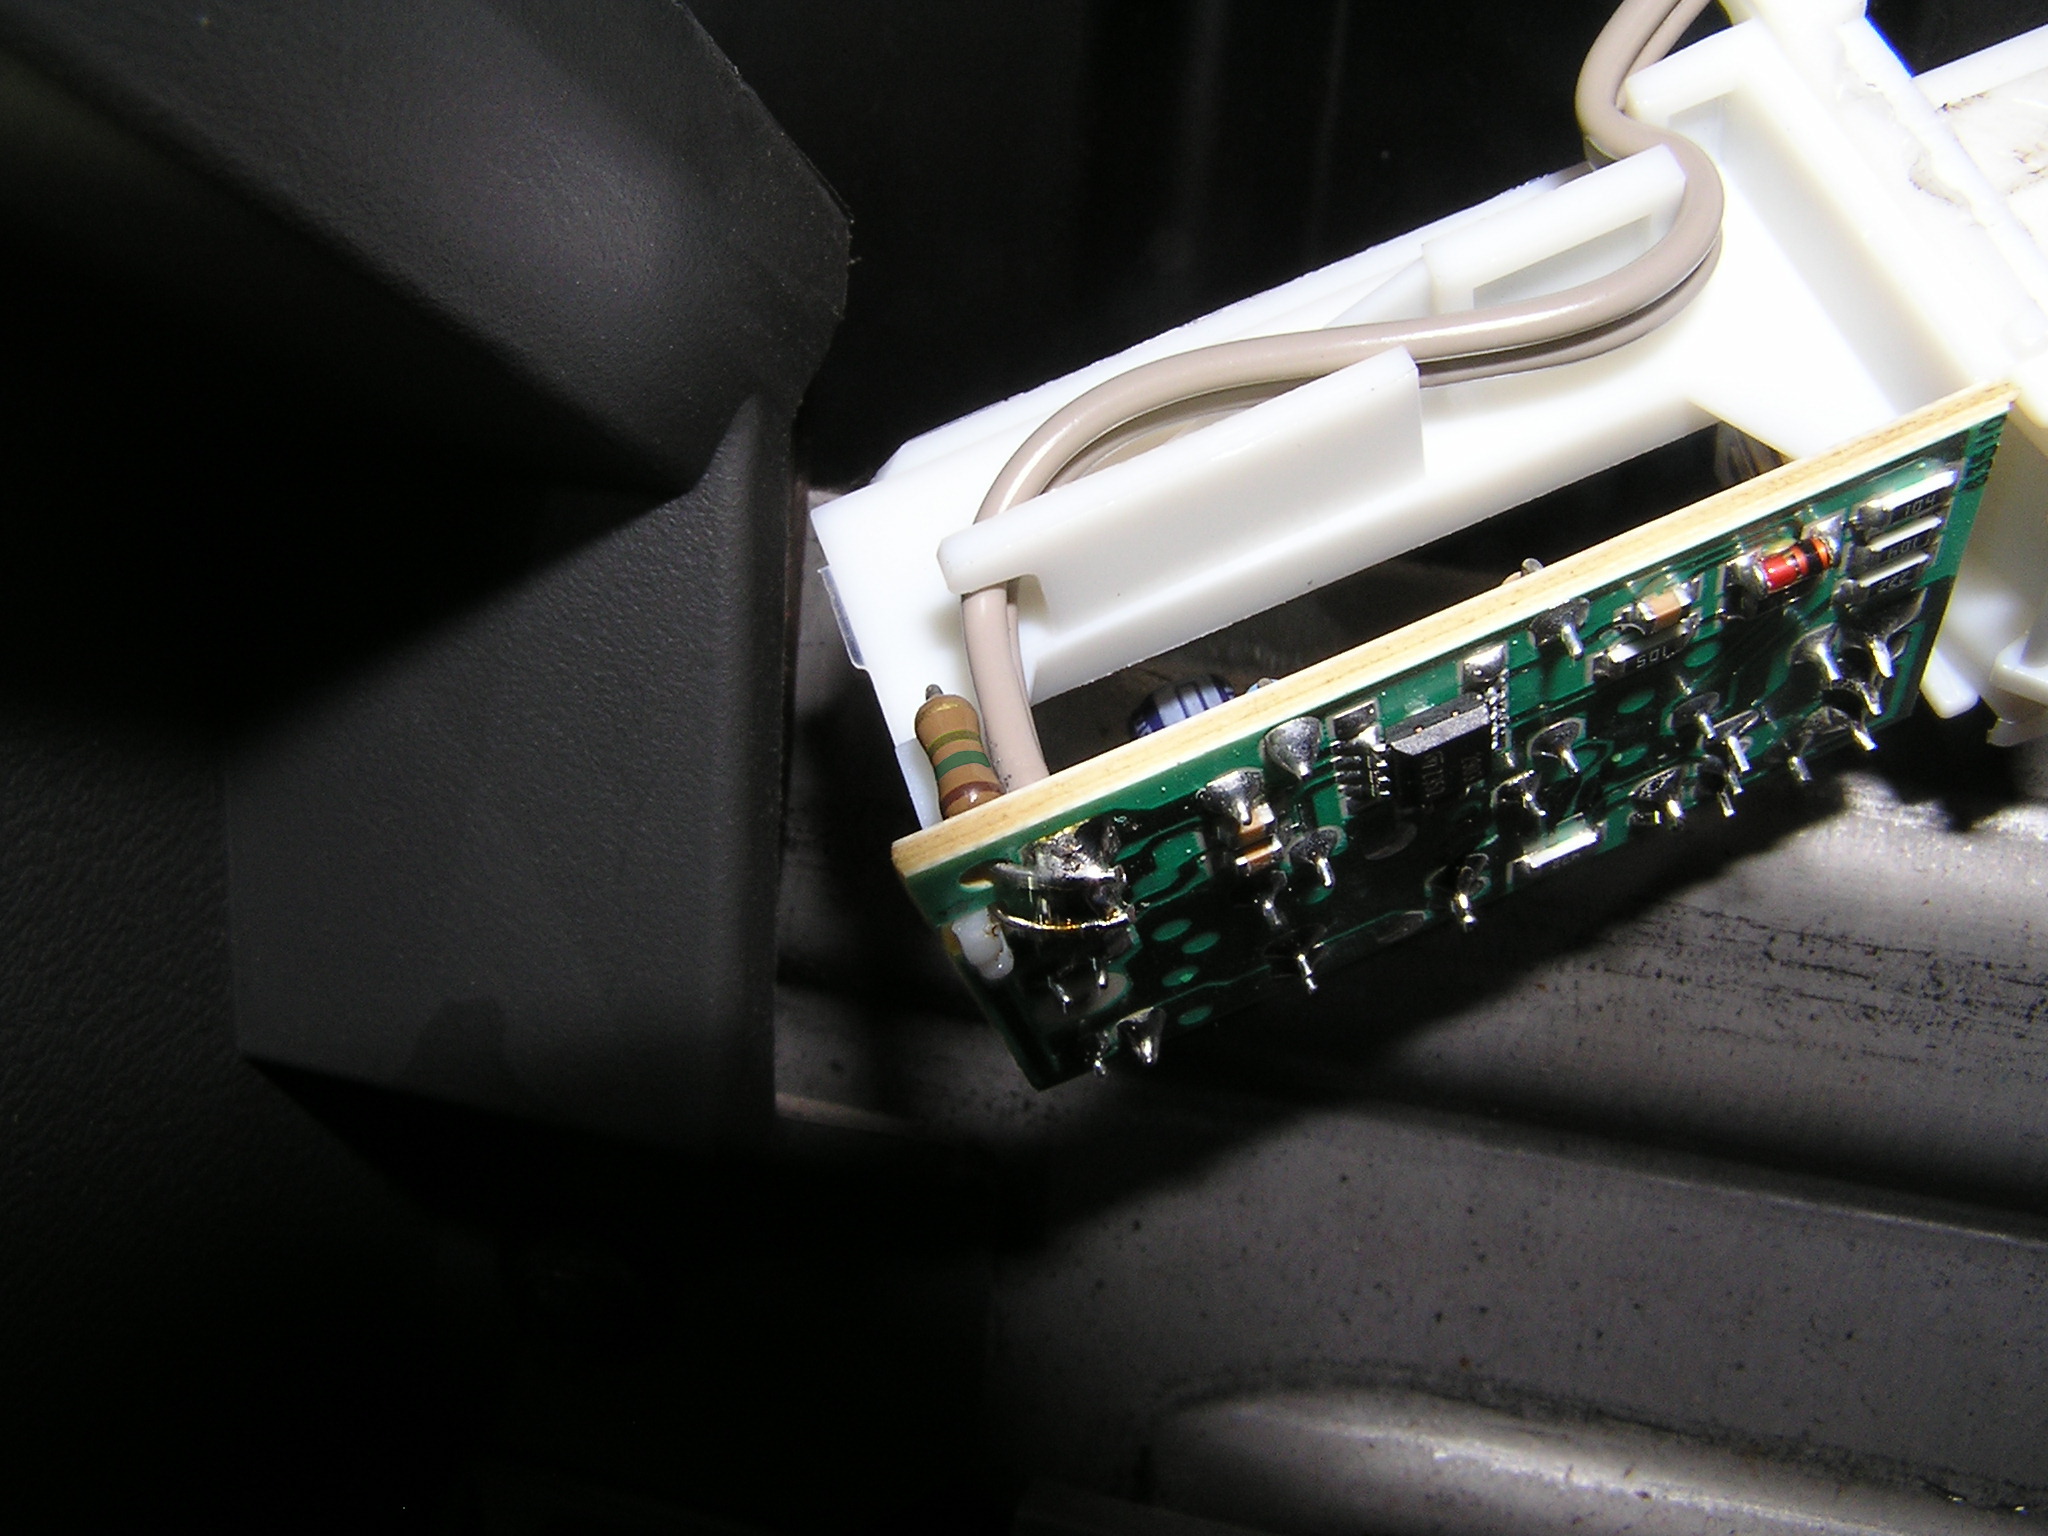
Look closely at the circuit board. The grey wires go to the evap sensor so these are what we are going to modify.
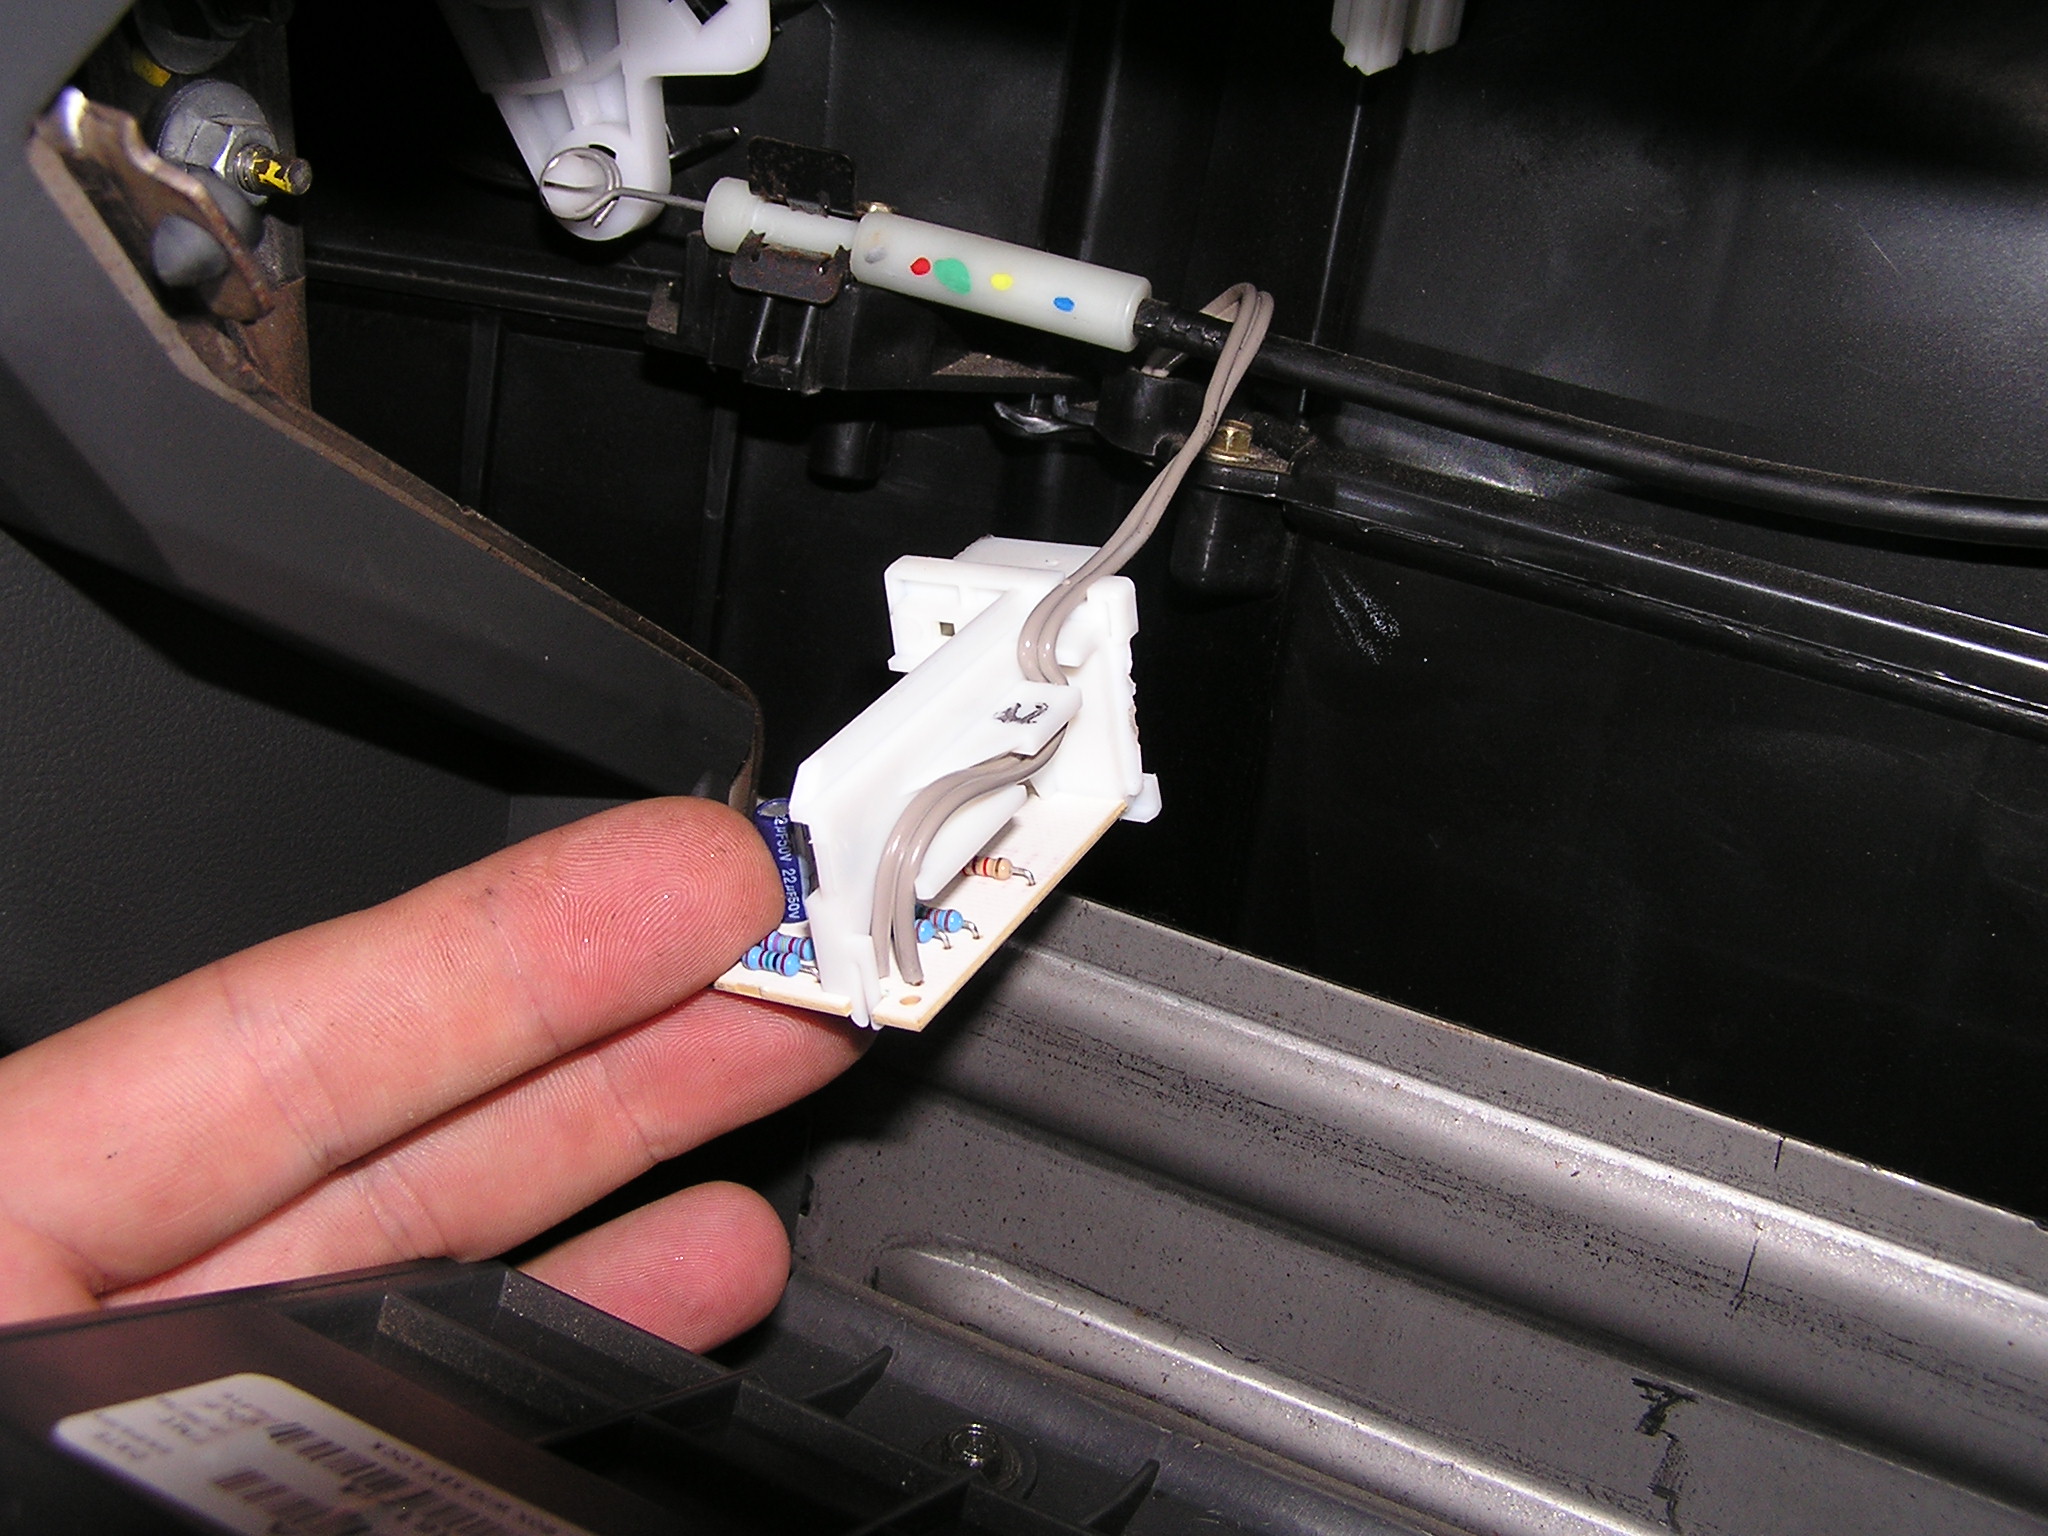
We want to solder the 150K – 200K Ohm resistor parallel across the grey wires. Solder one end of the resistor to one grey wire and the other end to the other grey wire. There is no polarity on the resistor so it cant be soldered backwards. No worries about that. I soldered on the underside to the same pad the grey wires were soldered to.
Resister values have direct control on the sensor as follows:
150K Ohm – Ice Cold
180K Ohm – Cold
200K Ohm – Warmer
Any of these values will make your system colder than it currently is so you may have to experiment with the values to find something comfortable.

Be careful not to create a short and do not apply too much heat and melt anything other than the grey wire solder points.
That’s it. Cut off any excess wire leads from the resistor and put everything back together. I ended up using a 180K Ohm resistor. 150K Ohm will make it even colder and a 200K Ohm will be warmer. I live in Michigan so its not too hot here so I picked something in the middle. If you live in Texas you might want the 150Kohm. Be careful not to freeze up your evaporator. Getting colder than 38° F and you risk freeze up which can damage the coil. Good luck and have fun.
Man thanks for the post with pic. I have an 05 that I use as a shop truck. Question, why not put the resistor on the wire vs board? The wires are exposed so it would eliminate the minor struggle of getting it out. Also, I’m considering wiring in a pot to see what I like best. Mainly because I have a 200/ohm pot and only 68/ohm resistors.
Thank you for this post.This this fix solved my problem. I went with the 180