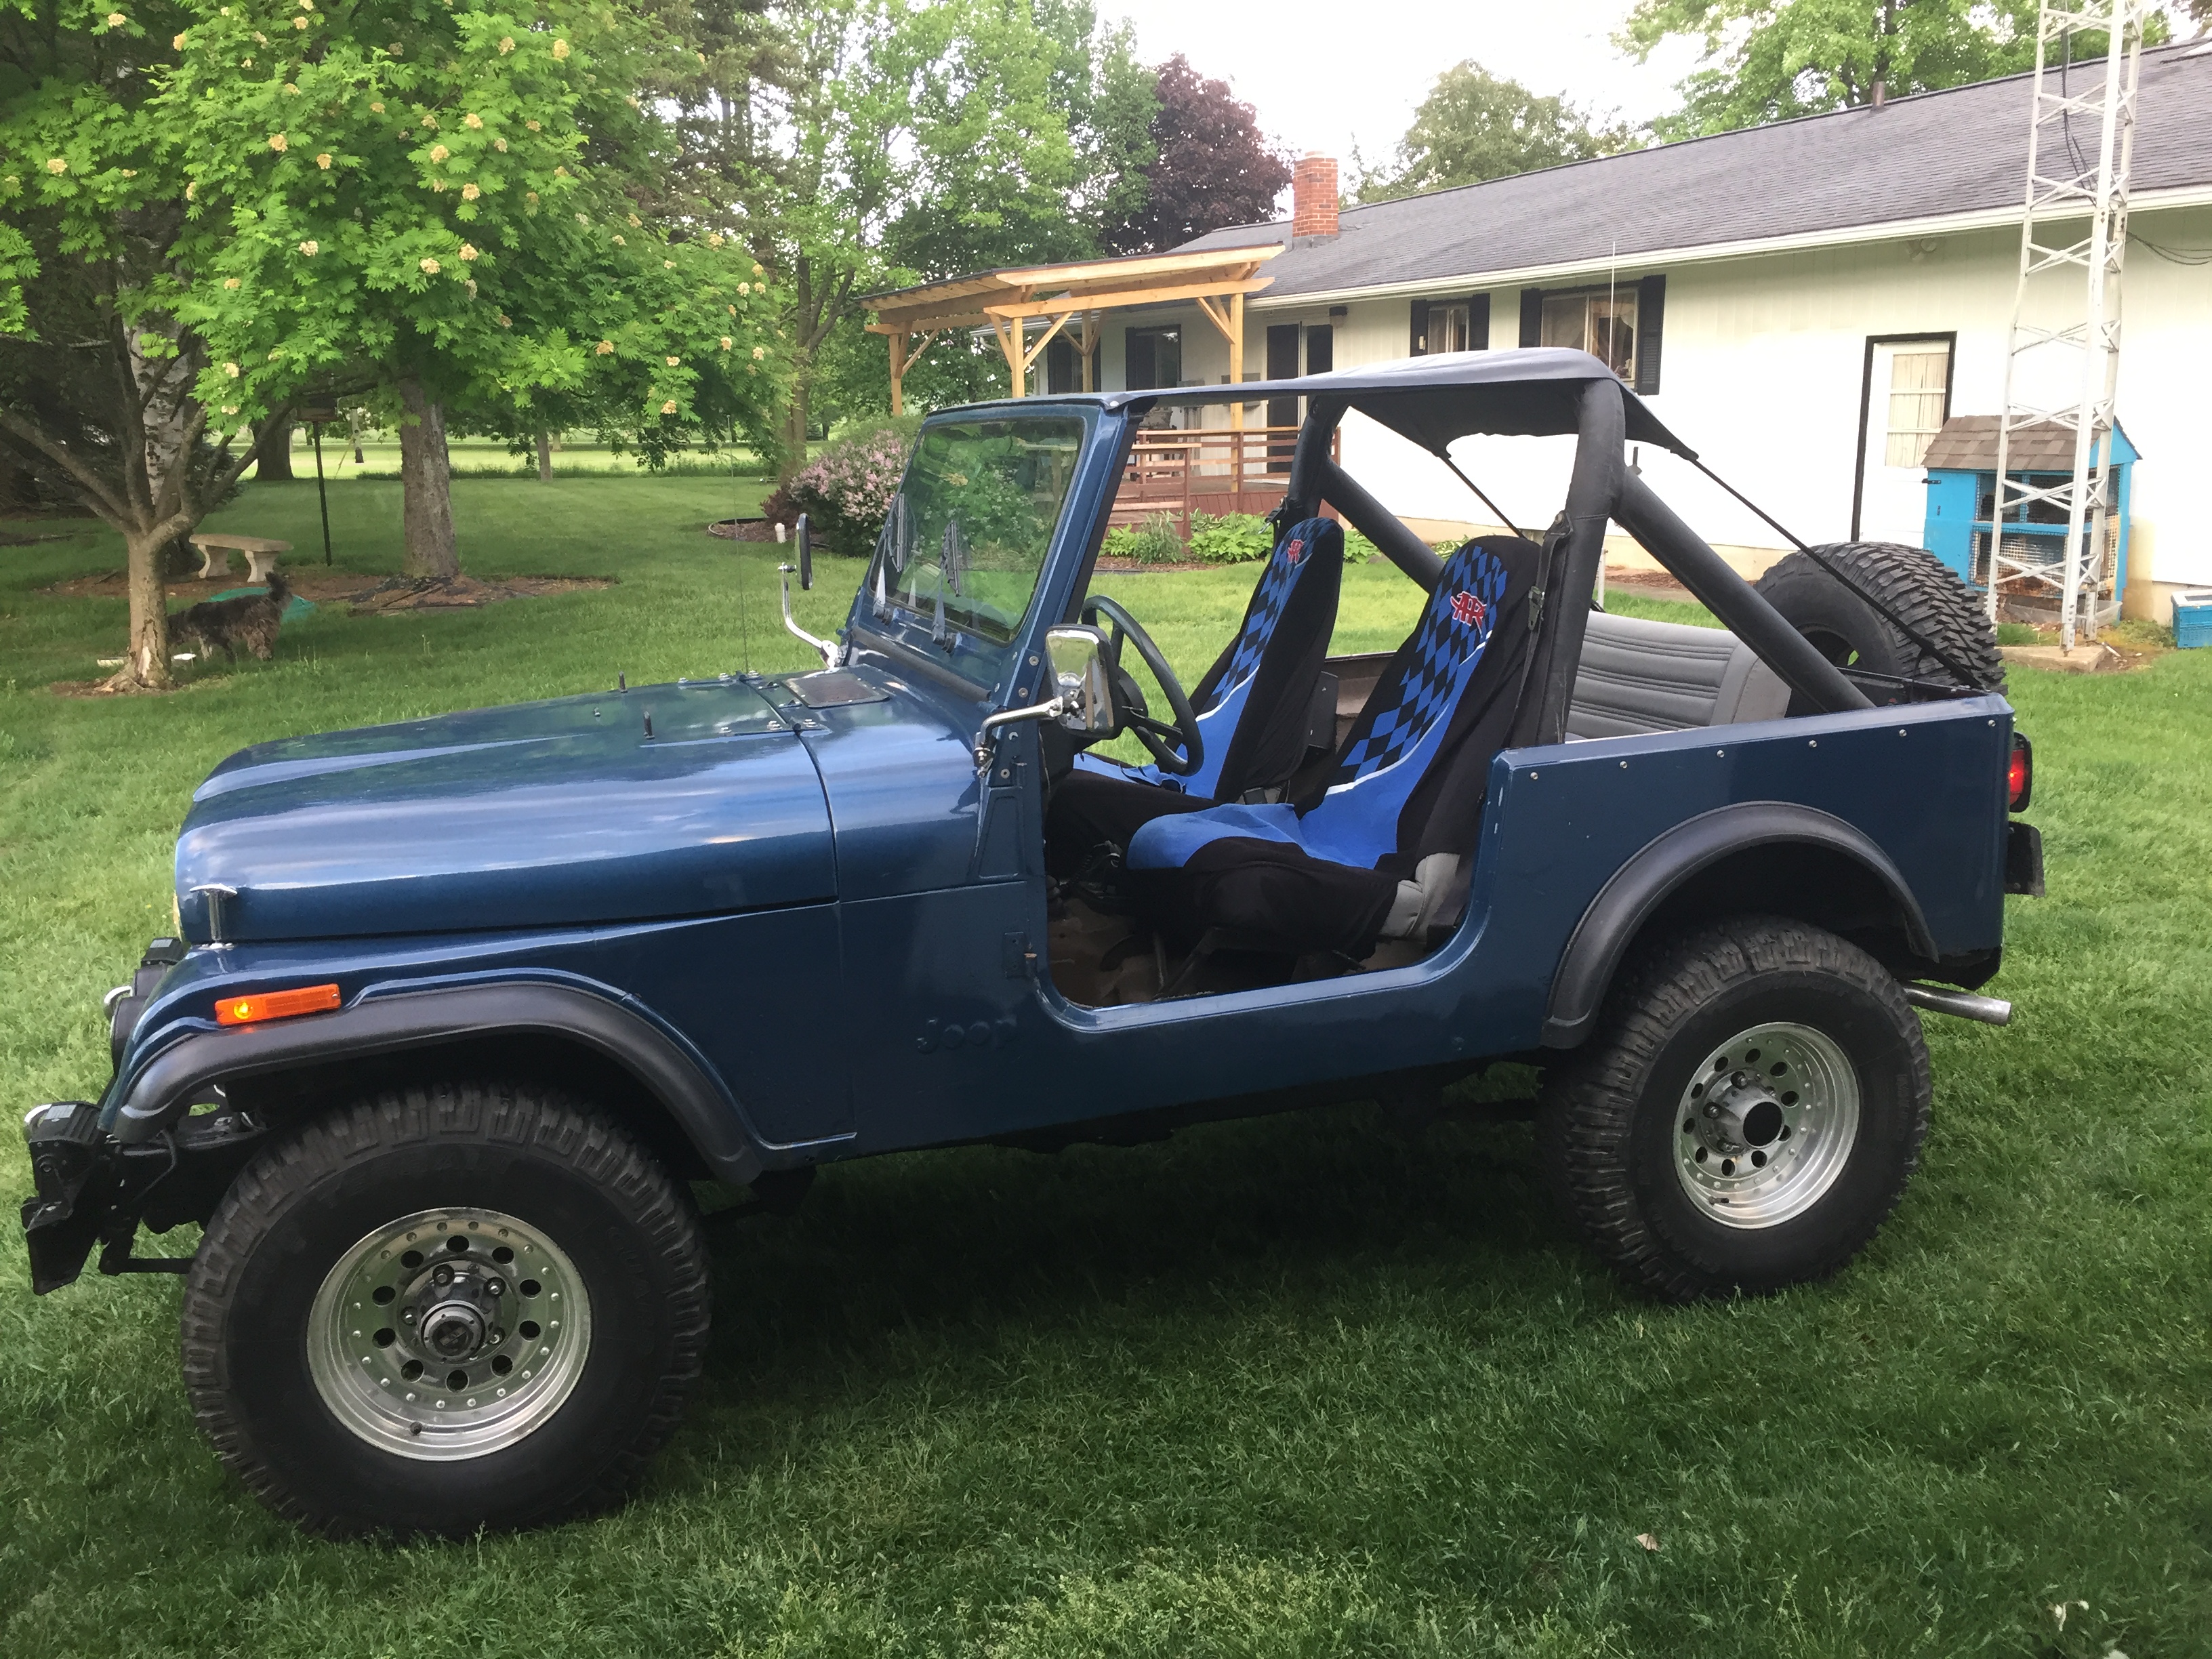
My Jeep is a 1986 CJ7. It originally had a AMC 258 6-Cyl with a T4 transmission and I installed a rebuilt 1973 AMC 304 V8 into it. The swap is pretty easy and did not require any special fabricated parts or expensive adapters. The AMC V8’s are all the same external size and bolt pattern so this install applies to the common AMC 360 as well. I’ll list all the “issues” I ran into and explain how I got around them.
I rebuilt the 304 myself and I will not go into much detail on the rebuild itself. I’ll show some pictures of the engine but the rebuild is for another write up some day.
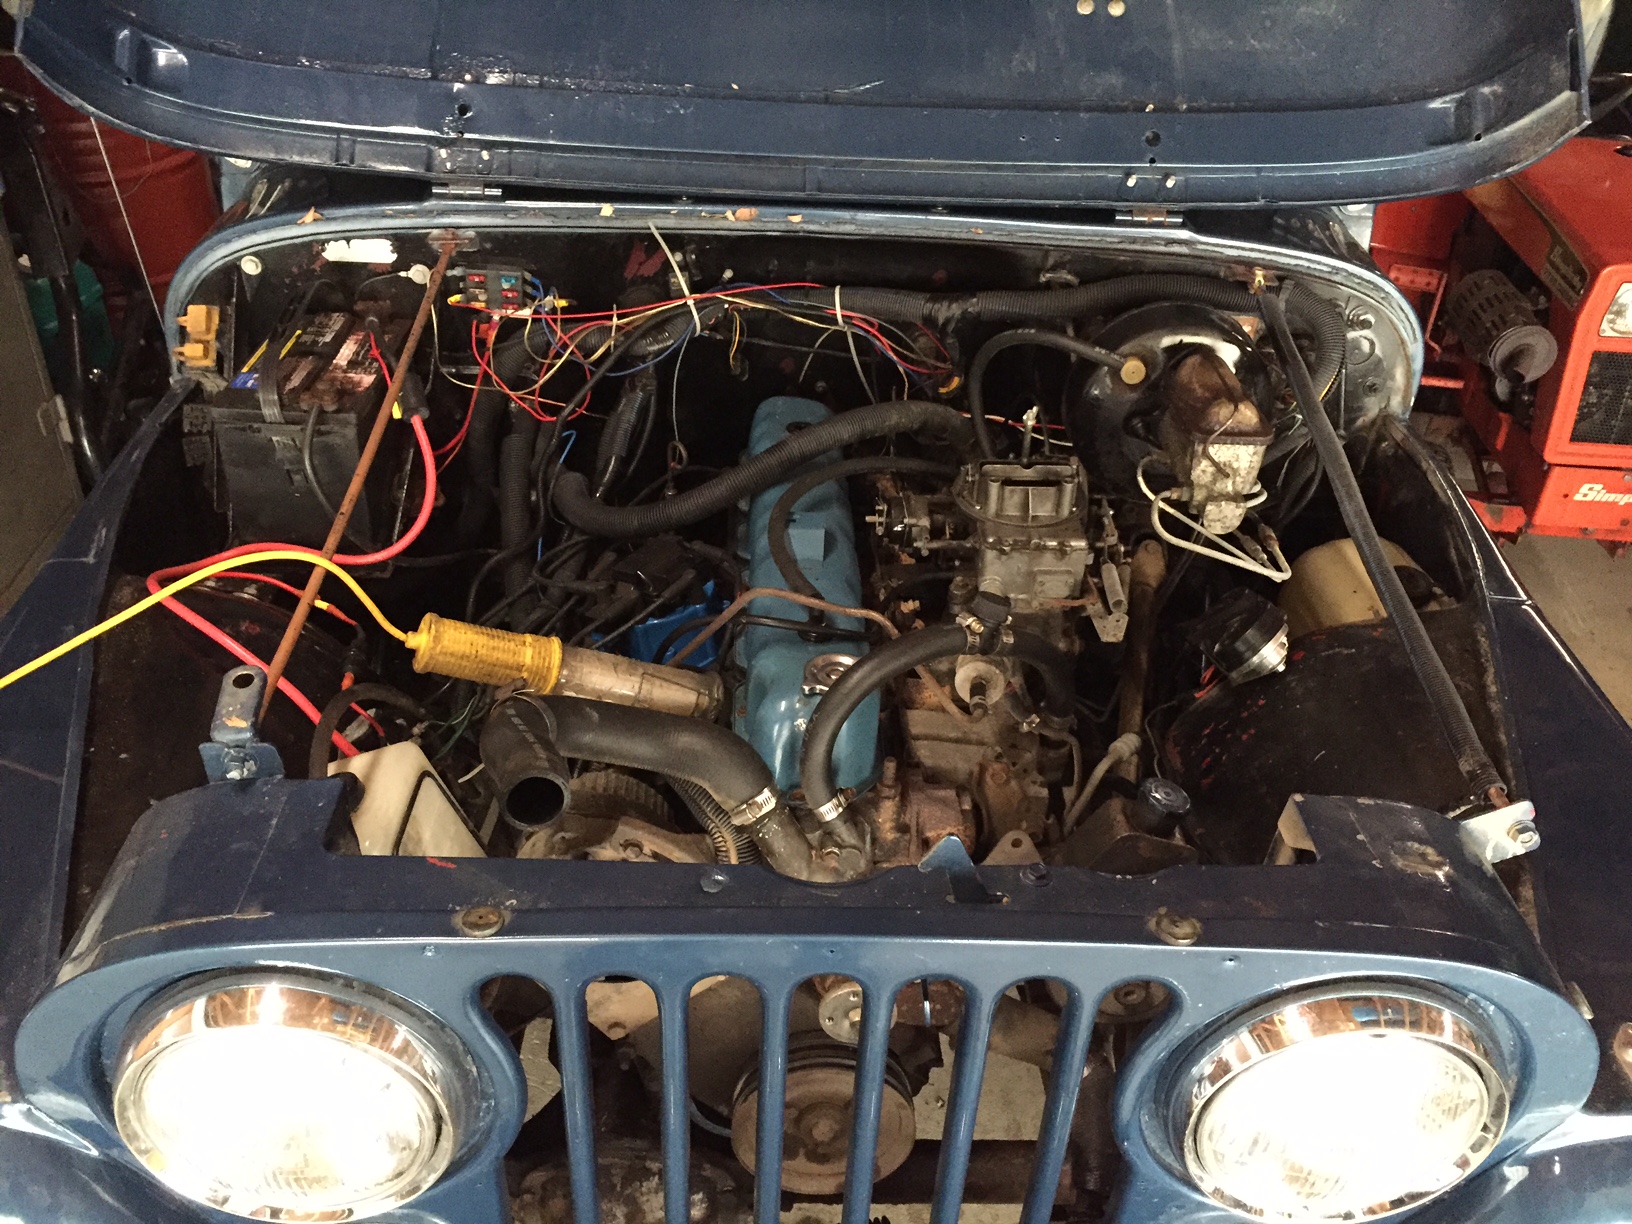
My old engine was the common 258 6-Cyl shown below:

The 258 engine ran well and did not smoke. HP was pretty bad and I had trouble accelerating up steep hills with the crappy 2.73 axle ratio. I often had to down shift and had the gas pedal to the floor. It was probably time for a rebuild or new engine.
I searched Craigslist and found a running AMC 304 for $200. I took the guys word for it and bought it since I was going to strip it down anyways. It ended up being a good block and I did not have to spend any serious money for new heads or anything like that. This is very important: Make sure to buy a COMPLETE engine with the alternator and power steering brackets. Also get the V8 motor mounts. If you don’t, you will be searching junk yards to find all this stuff which is a pain and cost money. I picked a nice torque cam (Comp CAM XE256H) and bought the matching spring and lifter kit. I did the usual rebuild with new oil pump parts, new rings, bearings, bored cylinders, AMC Performer 4 barrel intake with Holley 600CFM carb. I also upgraded the ignition to modern GM style HEI. This is a “must” have for sure. It greatly simplifies the Jeep wiring and provides much better spark to the cylinders. This was the best single upgrade I did to the engine in my opinion. Lots of guys install the AMC 360 and that’s fine. I personally like the 304 and did not want to upgrade the drive train to handle the HP that the 360 has. I was looking for a little more power and the classic V8 sound. The 304 delivered both for me.
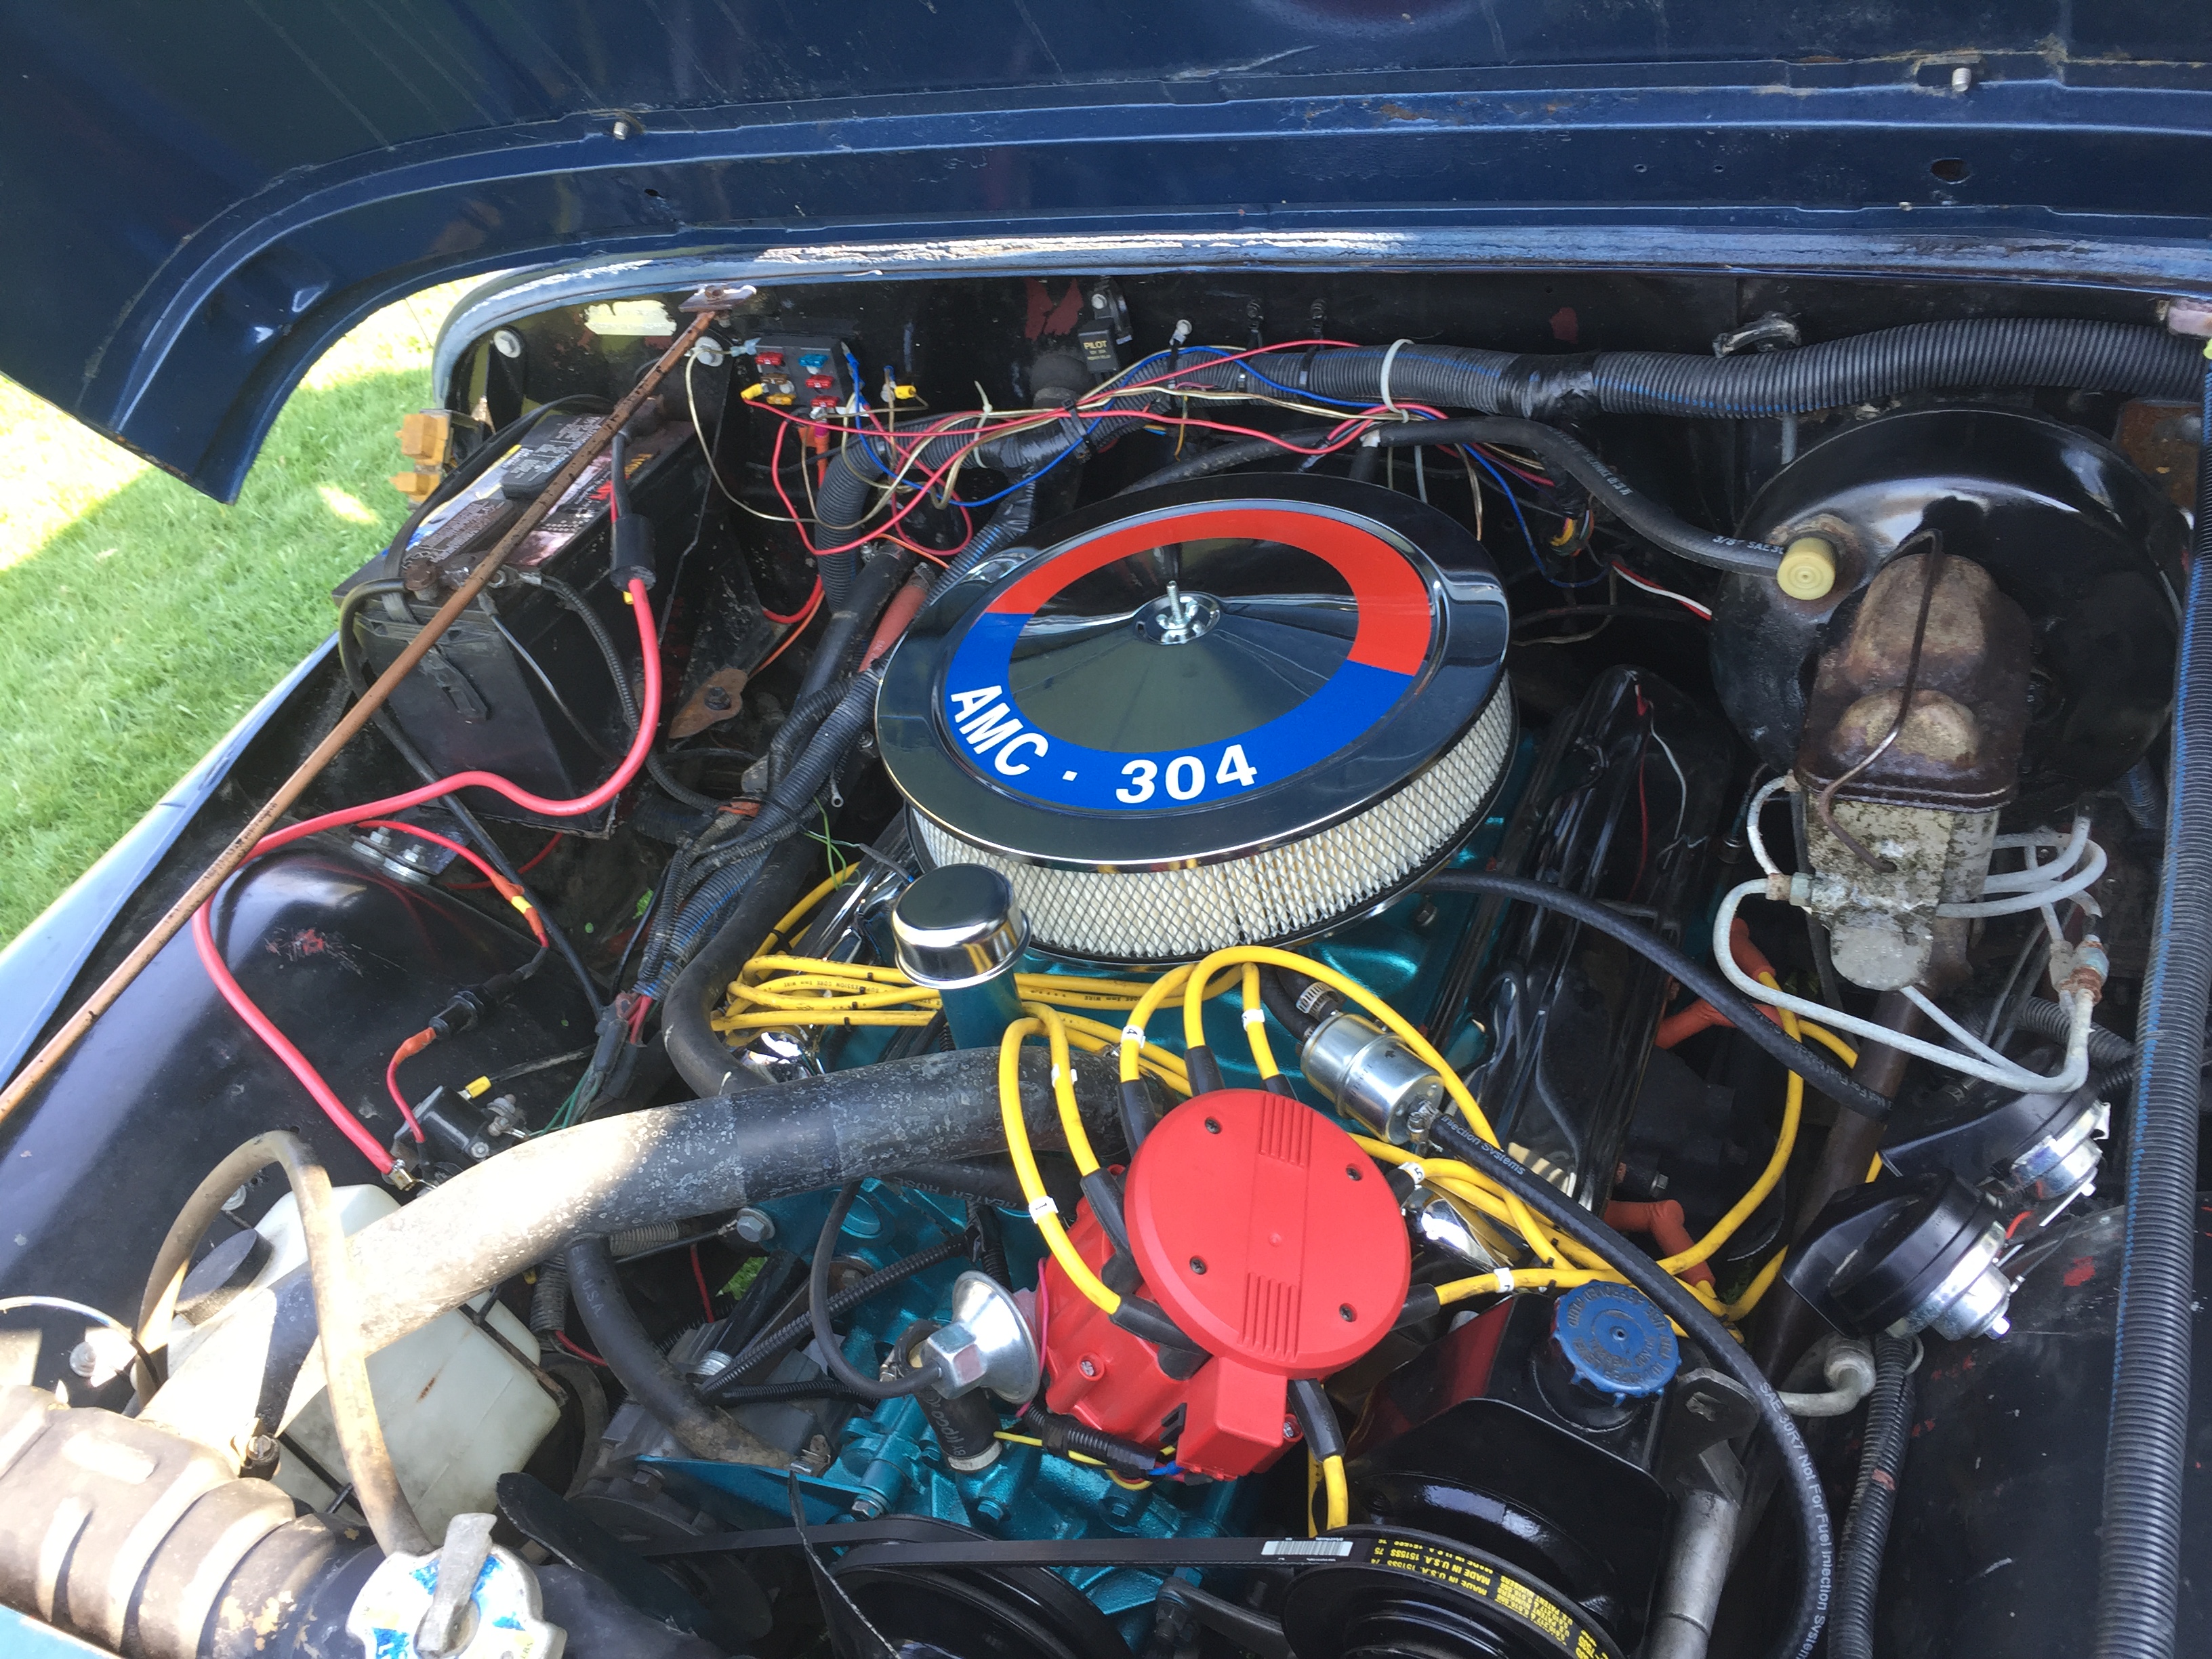
Rebuilt 304 V8 shown below: (don’t use the 4 blade fan it sucks bad). I swapped it for a 7 blade with clutch later on. I used real AMC blue paint which is Seymore EN-66 Hi-Tech engine metallic. It looks great and is sold on Amazon for about $11 a can.

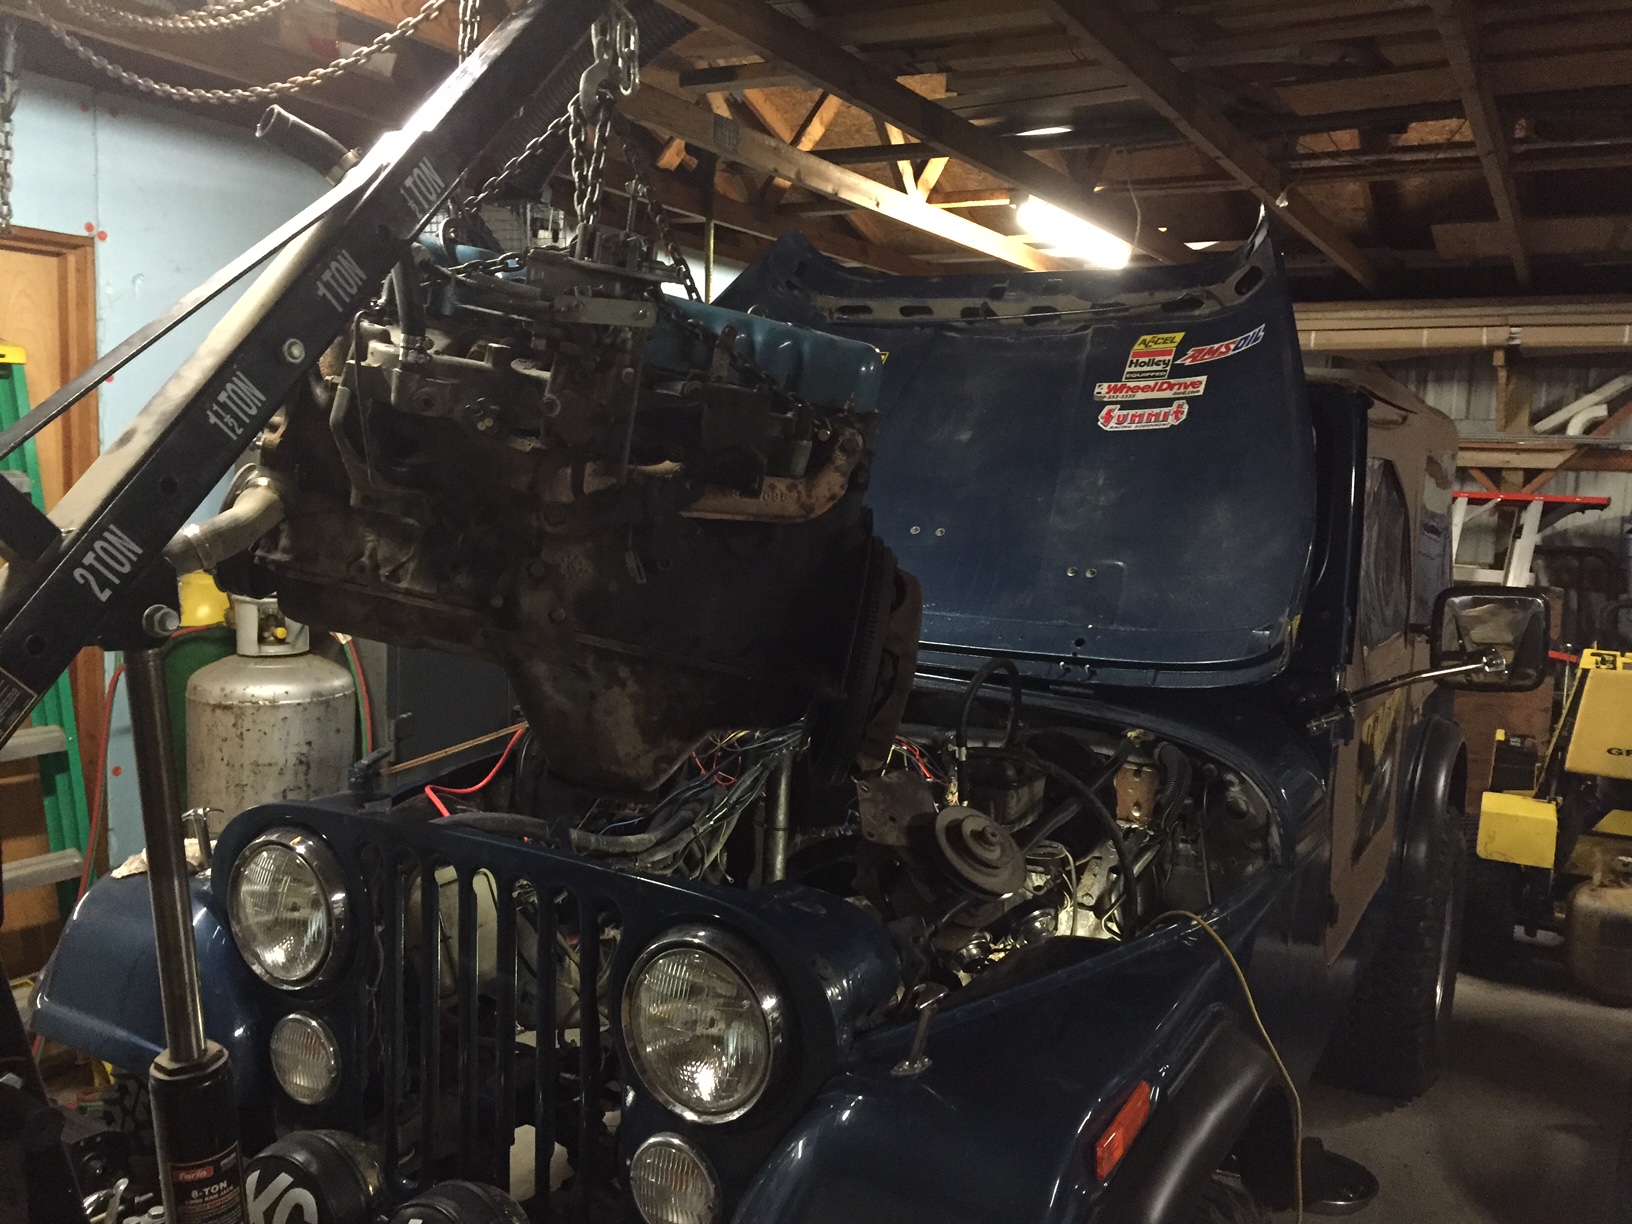
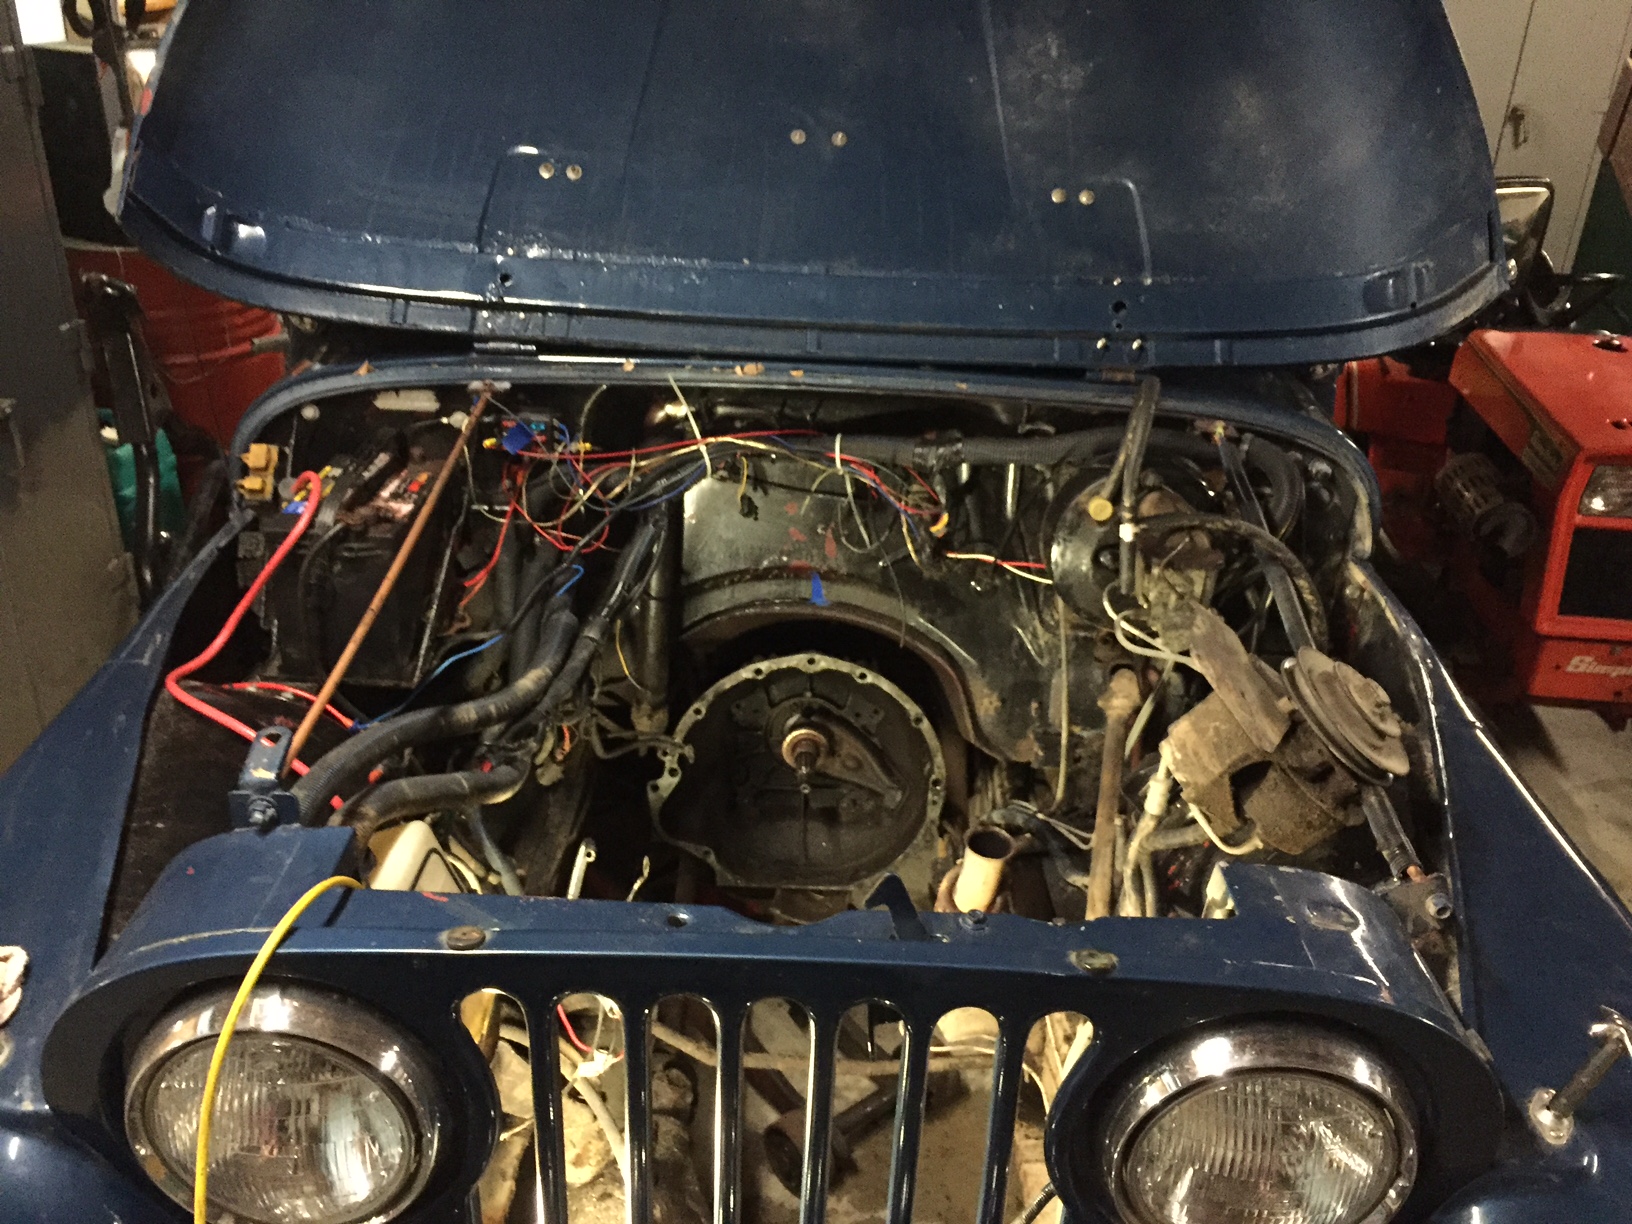
The first step is to remove the old 258 6-Cyl. I used a 2 Ton engine lift which made easy work of it. I unbolted the engine from the T4 transmission and left the T4 in the Jeep. I did unbolt the drive shafts and slid the transmission back away from the engine about 6 inches. Disconnect all the wires & hoses. I labeled all wires with masking tape ( tachometer, 12v, thermostat, oil pressure, etc) this made it easier for the install later. Unbolt the exhaust pipe and completely remove the exhaust system from the jeep. This will not be used again. I removed the power steering pump and just moved it aside. This will be reused later. I left the alternator on the engine and just unplugged it. Unbolt fuel lines and anything else connected to the engine.

Unbolt engine from frame and transmission and pull out with hoist.
Below is the removed 258. Its sitting on some blocks of with with wheels so I can move it around. I sold it on Craigslist for $350 to recoup some $$$ from the swap.

Issues I had to deal with:
- Engine motor mounts. The old 258 mounts will not bolt up to the V8. I had to use the V8 mounts from the original vehicle.
- The fuel line from the tank to the fuel pump is on the wrong side of the V8 engine. The fuel return line is okay. I ran some steel line under the radiator over to the other side to the pump. There is plenty of room.
- Radiator: I had to buy the V8 hoses. The stock 6-cyl radiator in my Jeep was a 3 core and is PLENTY for the new V8. I just used the old radiator.
- Power Steering: I removed the mount brackets from my old power steering pump and used the V8 brackets. I had to remove the belt pulley which was a pain to get off. I had to buy a special puller for $20. Once that was done it was an easy bolt on.
- Alternator: non issue. I used the old one that came with the V8. Same electrical plugs as the 258 6-cyl alternator.
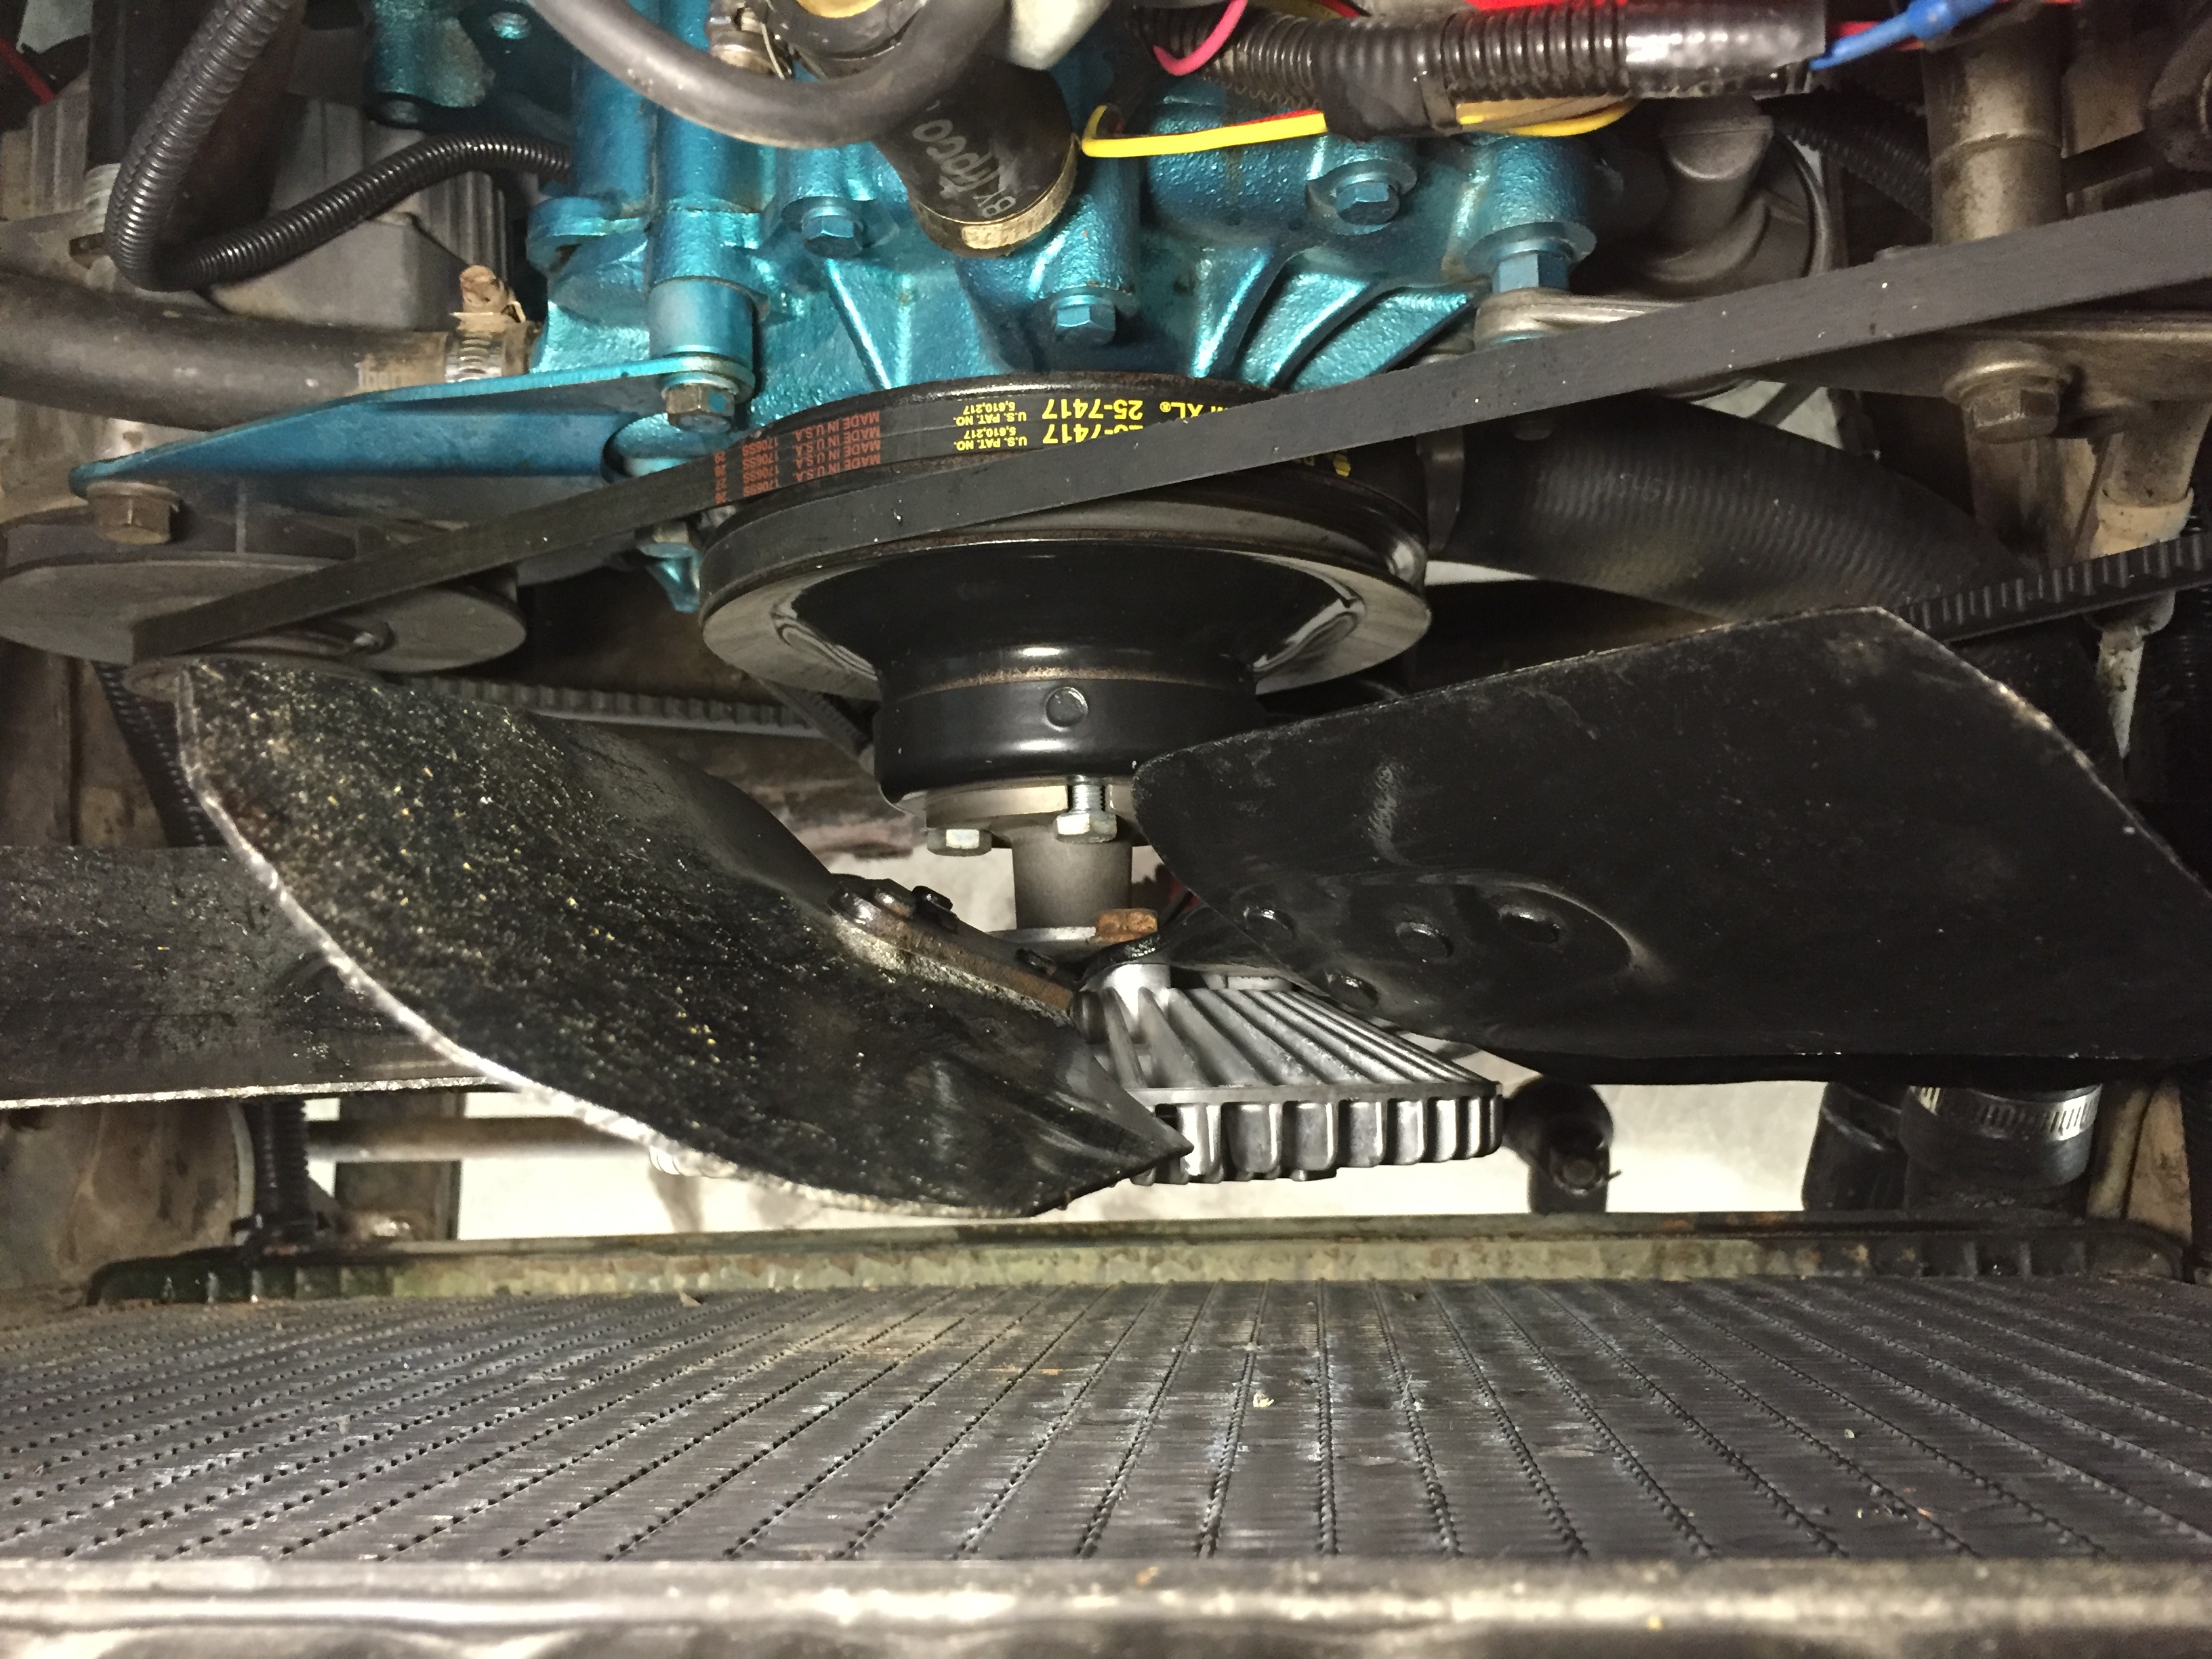
- Fan: DO NOT USE the 4 blade fan. Throw that piece in the garbage. Buy the original used 7 blade jeep clutch fan off ebay . They are the best and move an insane amount of air. You must use a clutch with this huge fan or you will have an irritating loud noise from it. Your gas mileage will also suck without the clutch. I bought a brand new fan clutch from NAPA #272310 for $35. I have about 1.5″ if clearance from the radiator (see photo below). I am not using a fan shroud and the engine has no problem staying cool.
- Wiring: If you use the old Motocraft ignition on the V8, your old ignition module and wiring will hook right up. The old module is the same for the 6Cyl and the V8. I converted to HEI distributor and only need 3 wires to the distributor. 12v, ground, and the tach feed. I ripped the old module out along with all that crazy wiring. Its pretty clean looking now. 3 wires to the engine ignition plus water temp and oil pressure wire.
- Gages: Everything worked. Temp sensor, oil pressure, voltage all worked using the V8 sensors. The tachometer also worked perfect with the HEI distributor. I have no idea if the tach will read correctly with the original V8 ignition.
- Transmission: I used the original T4. It bolted right up but it shifted 1 inch closer to the front of the jeep. This caused my front drive shaft to be too long and my rear drive shaft to be too short. The T4 is pretty wimpy transmission and lots of guys upgrade to something else. I did not want to spend the money right now so I left it in there. As long as you don’t roast the tires all the time the T4 will hold up fine. I have been using mine for a year with no issues. If it dies, I’ll just replace it with something else.
- Drive shafts: Front drive shaft is too long and rear drive shaft is too short. I altered them both to fit with more instructions later in this write-up. Option 2 is to buy new custom length ones which are expensive.
- Axles: No change. I kept the front Dana 30 and rear AMC Model 20. I did upgrade to 1 piece axles in the Model 20 a long time ago. Ratio is 2.73 (I think) .
- Exhaust: No headers. I used original OEM V8 manifolds as headers will not offer my 304 any benefit for the way I built it. Stock manifolds are heavy duty, wont leak, and flow excellent. The passenger manifold is a common rear dump style and the drivers side has to be the center dump style in order to make room for the clutch linkage. I took the jeep to a local exhaust shop and had them bend me up a custom dual exhaust with Flowmaster 40’s. They did a great job tucking the pipes up out of the way and away from the gas lines.
- Clutch: Now is a good time to buy a new clutch and throw out bearing. I bought a OEM clutch kit for a T4 and 258 6-Cylinder from NAPA. You must use a pilot bearing for the T4 and 258 Engine. The T4 has a different spline and pilot bushing than the old V8’s with the 3 speed transmission. The brass pilot bushing will press right in perfect to the V8. The clutch is a 10.125″ and is fine. Buy a good quality throw out bearing that matches the clutch. The diaphragm type clutch which is what I used has a taller throw out bearing than the release lever type.
- Fly Wheel: The AMC V8’s are externally balanced. You must use the V8 balance wheel and do not use the 6-cyl one. No issues here because my V8 came with the flywheel.
- Gas pedal cable. The original 6 cyl will not fit (its too long). I bought the short OEM one for the V8 from NAPA. Its around 17″. There is a special engine bracket for it on the V8 which you must have.
Below shows the clutch fan clearance from the radiator. Its about 1.5″ which is about right. I used the upgraded 7 blade fan and the stock 3 core radiator for V8 cooling. The stupid 4 blade fan just does not cut it. The stock radiator is fine however so there is no need to buy a new one.
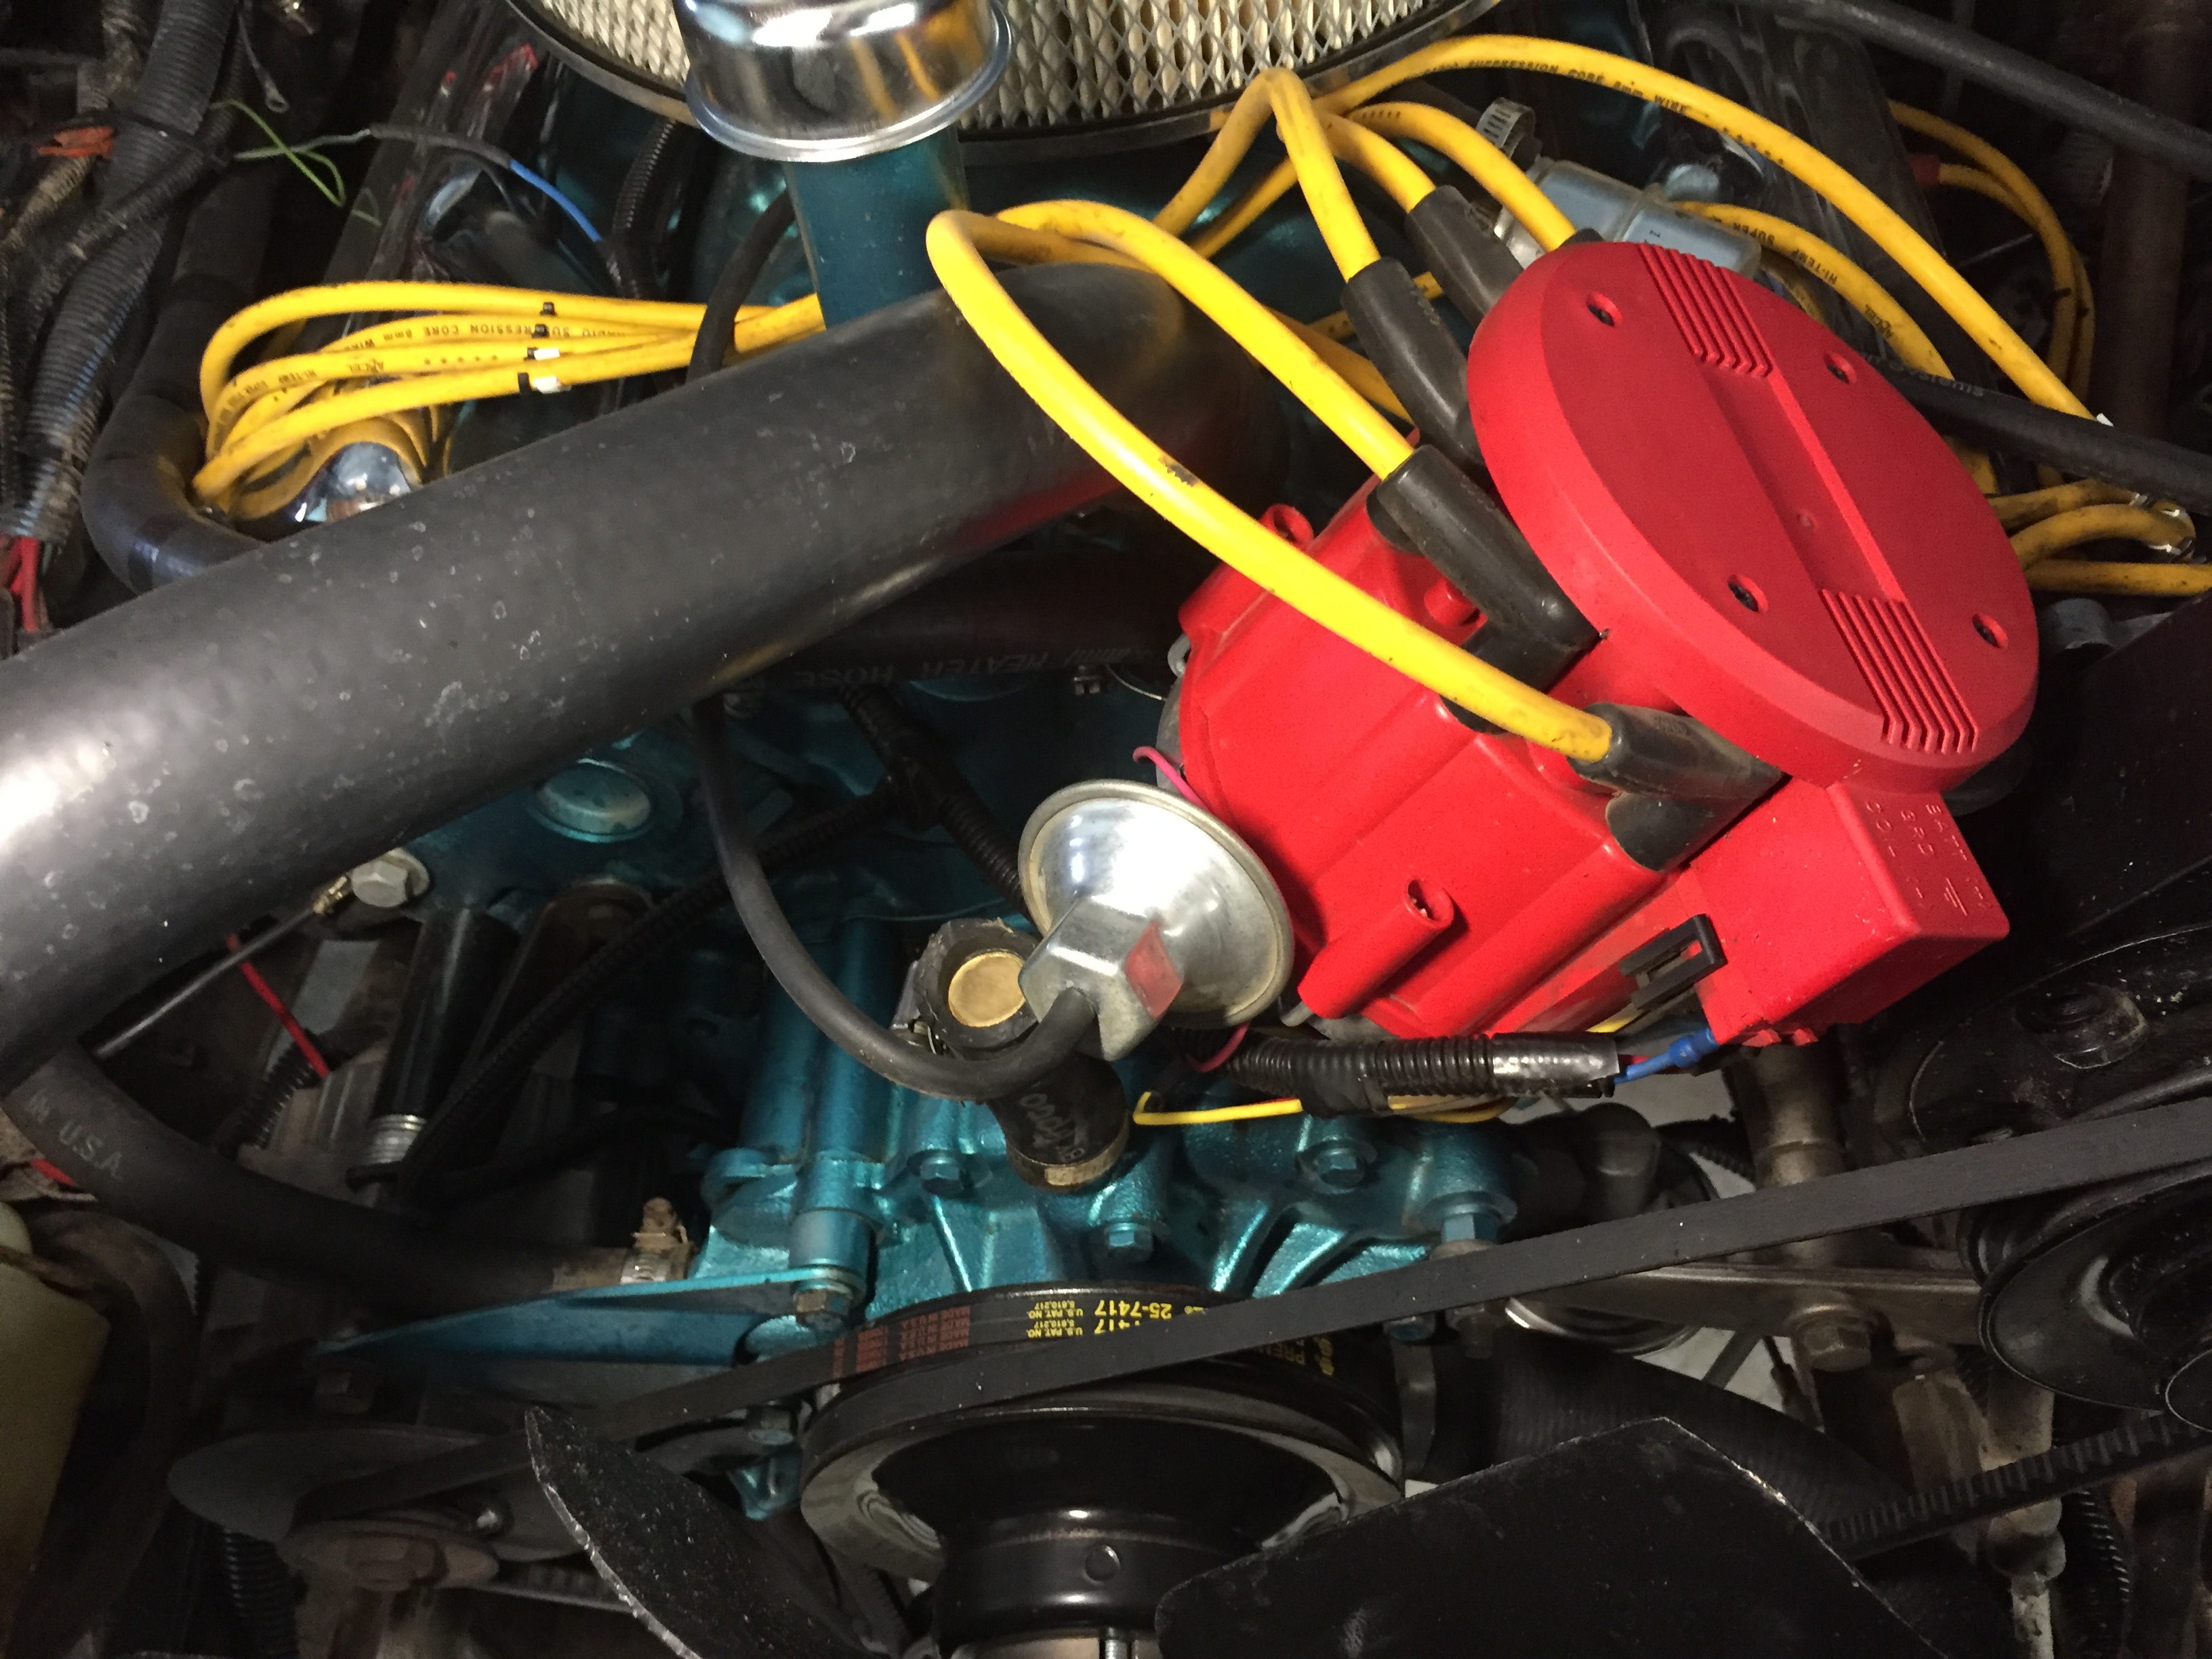
The GM style HEI distributor is huge compared the the old one. This is not required but was an upgrade I wanted to do. You can use the old motorcraft distributor and module if you want but it is really old technology and has its share of issues. I personally don’t like the old motorcraft setup. The modules burn out all the time and the spark is just not that great. The HEI setup with vacuum advance is fool proof and is plug and play for the most part. Only 3 wires needed, (12v, ground, tachometer). I had to position it like this to miss the fan belts. (shown below). I also plugged the small coolant hose that runs to the intake. I would have used it but I could not get the rear inlet plug out of the intake manifold. It was seized in there forever. This is only for preheating the manifold for emissions purposes anyways. It has no negative affect on the engine once it reaches operating temp anyways.
You must use the V8 motor mounts (shown below). They will bolt in the exact same spot as the 6-Cylinder mounts. The V8 will lower in easily and align right up no problem.

Throttle cable and bracket shown below. I had to use the short cable. Seems the auto parts dealer sells a long and short version. Later I went to TSC and bought a stronger return spring for the carb. I was having trouble with a “high” idle when sitting at a stop light. It was from the weak spring so I replaced it with a new stronger one. Problem solved.

Drive Shafts:
Okay I had some trouble with the drive shafts not fitting. The transmission shifted 1 inch forward which caused my drive shafts to bottom out (which is bad for them).
The rear drive shaft had to be lengthened. I ended up cutting it in half and making a “sleeve” on my lathe that pressed into it. 1st thing to do is cut it in half shown below.

I made a “sleeve” that will press inside the drive shaft.
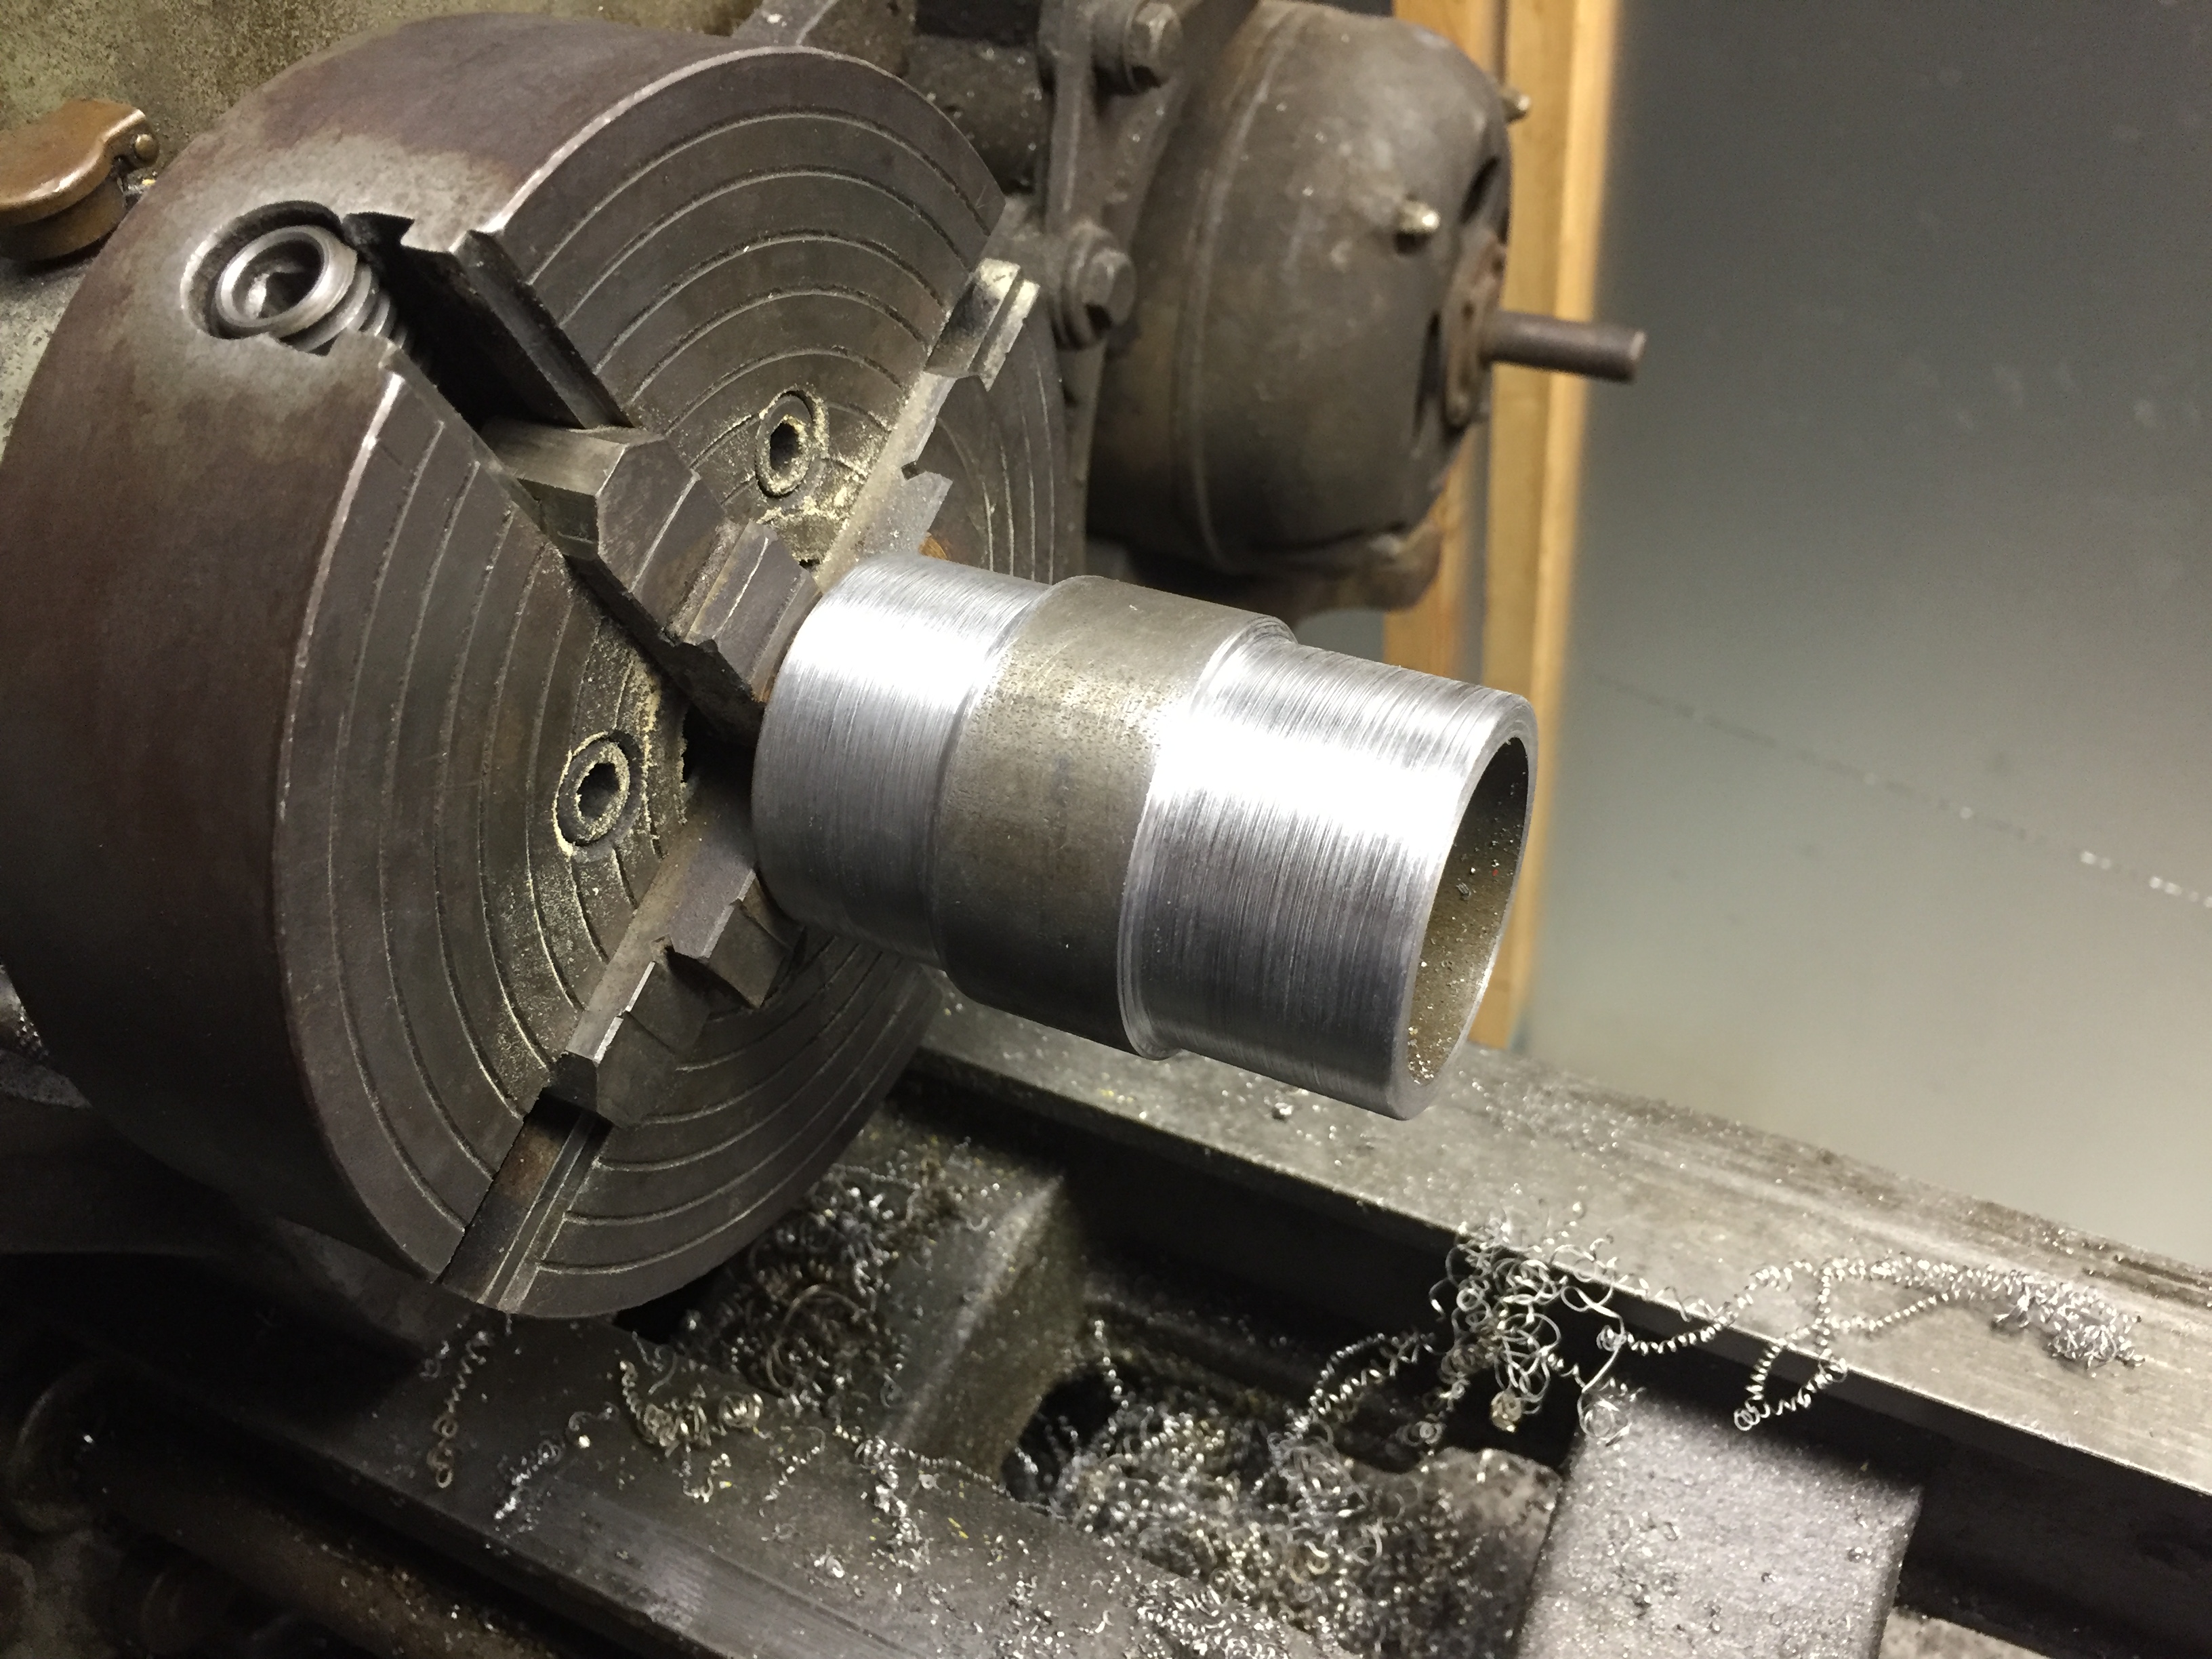
I pressed the sleeve into the shaft shown below. Then I welded both seems all the way around the shaft. The shaft has to be perfectly straight so I tack welded it first and measured the drive shaft run out with an indicator. I got it within 0.003 inch which is good enough for me.


The front drive shaft was easy. I just cut a 1 inch chunk out of it and welded it back together. I clamped it to some heavy duty angle iron to keep it straight. No problem. (see below).


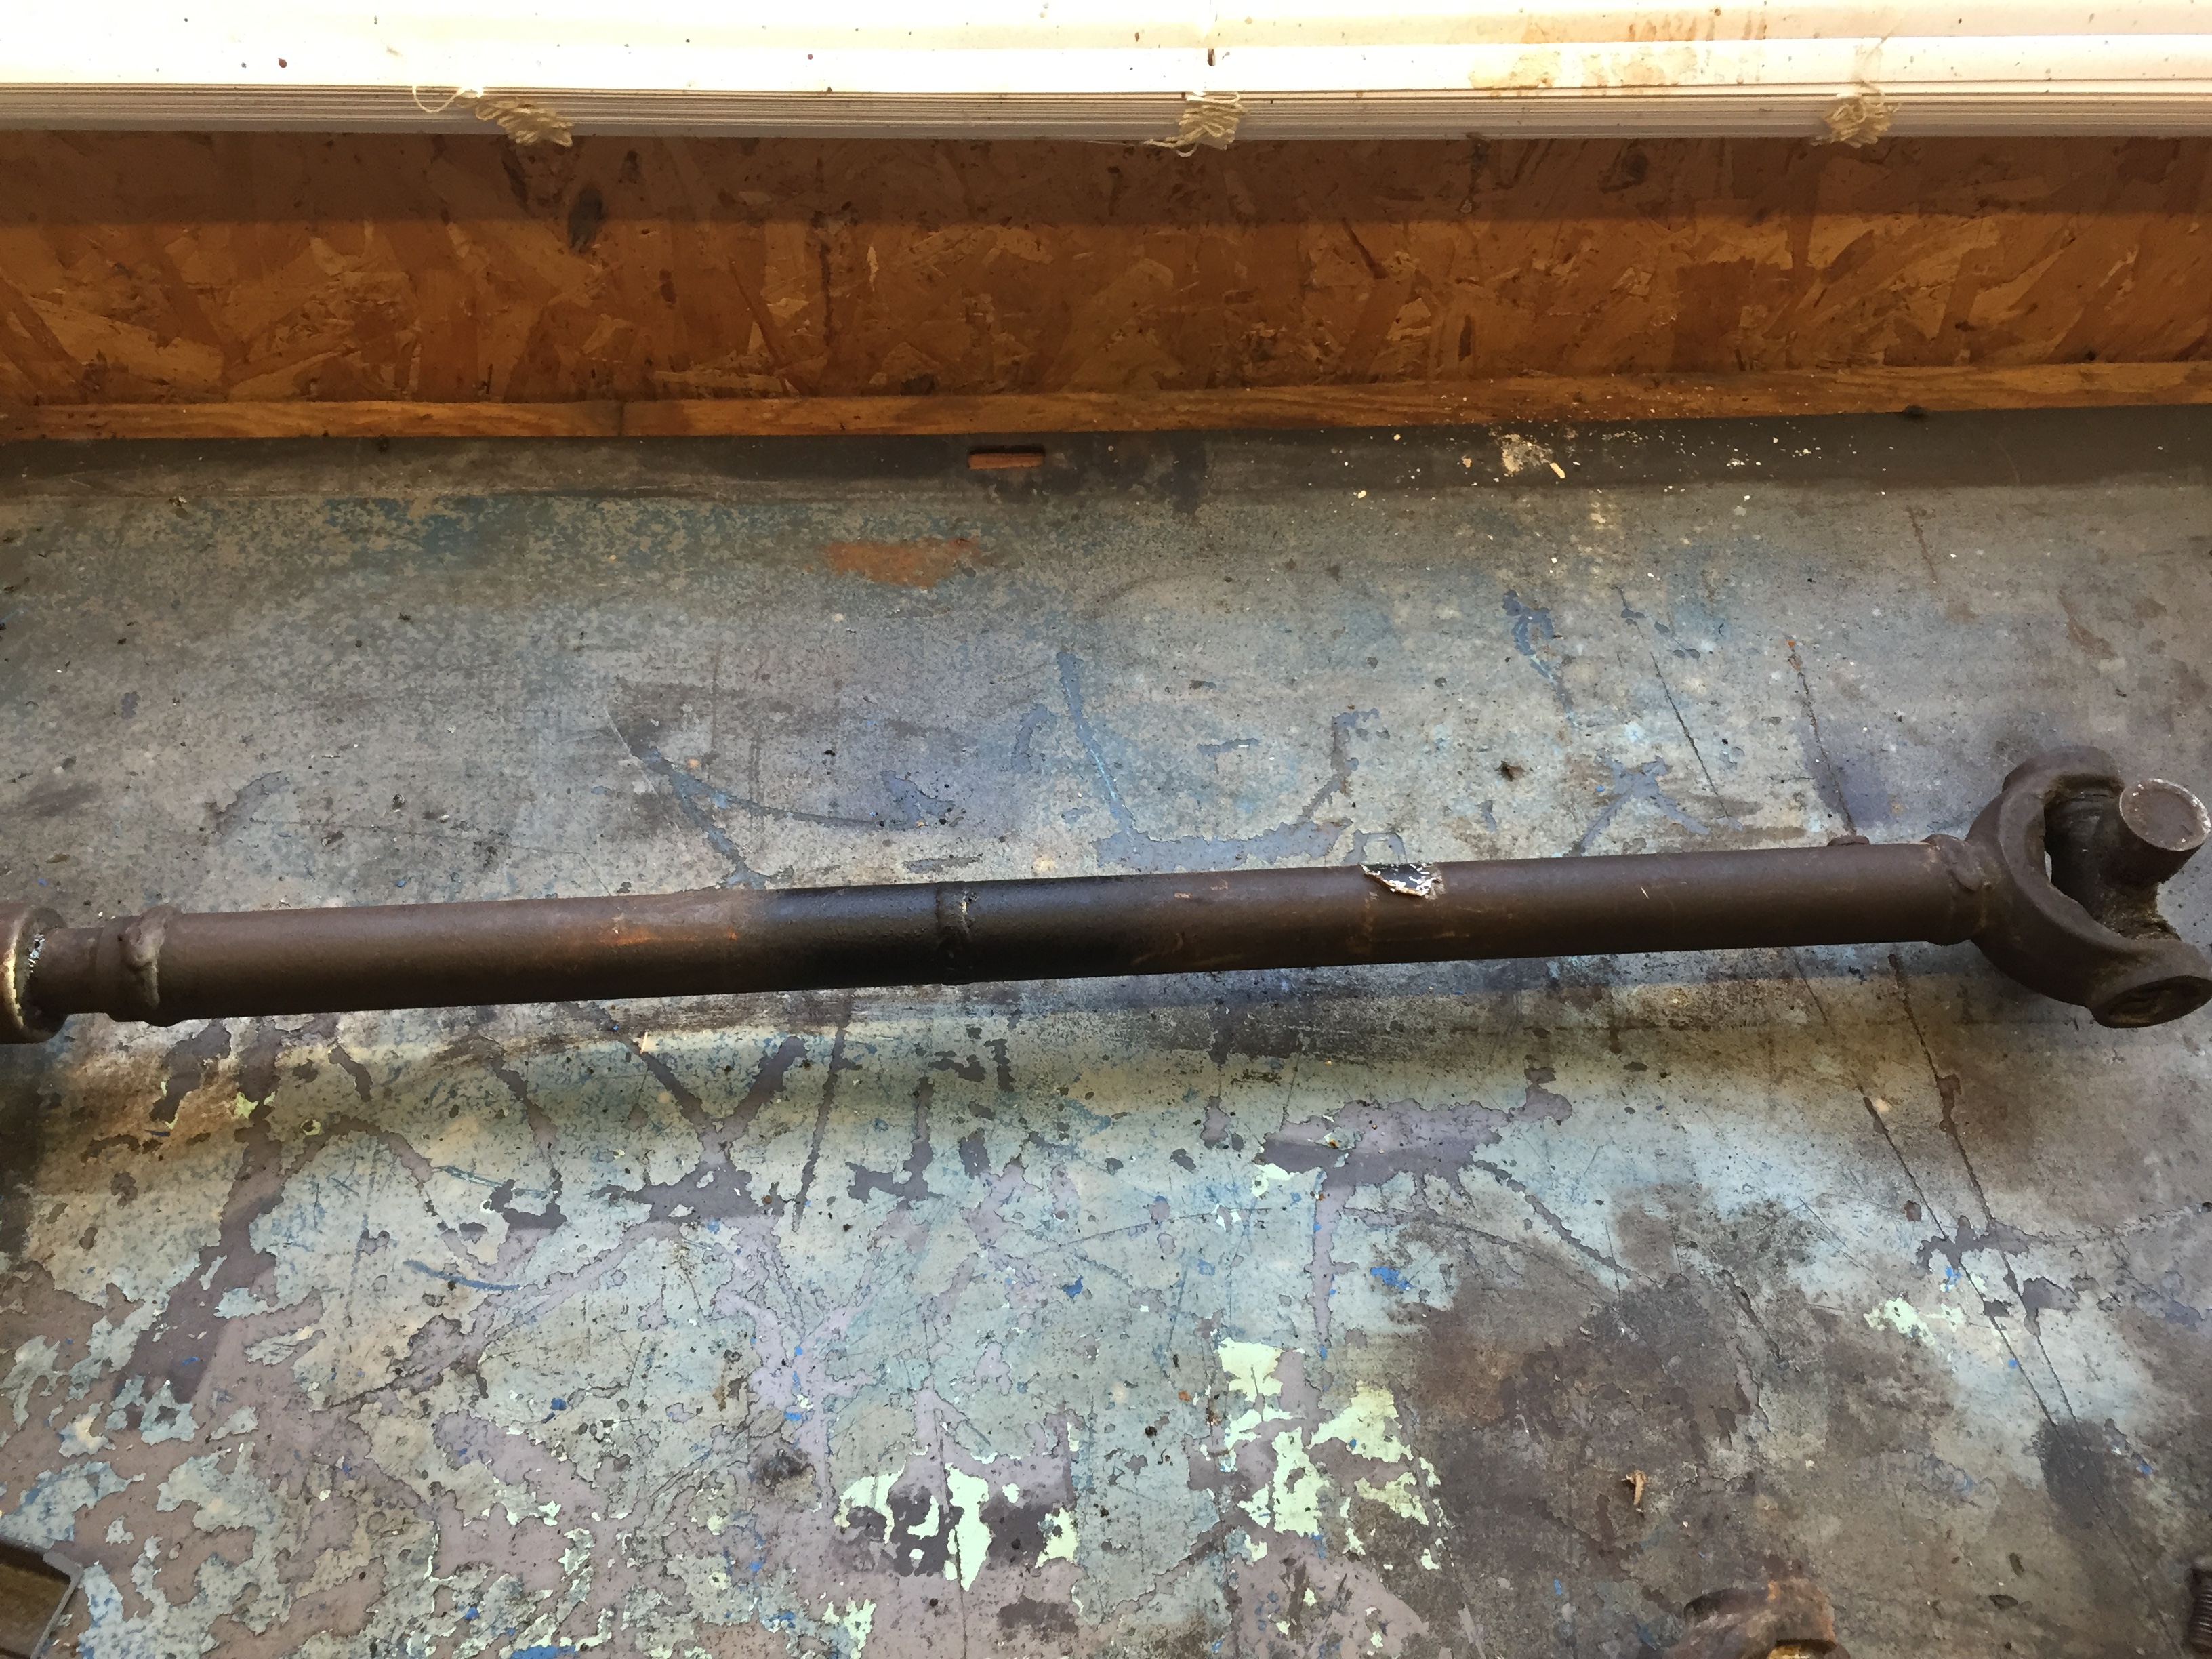
That’s about it. The V8 install was the easy part. The drive shaft part was a nuisance but not difficult.
Performance is great! The power increase with the 304 is amazing. I can squeal all 4 tires in 4wheel drive on the pavement and it will throw you back in your seat with a smile. . lol. The sound is classic V8.
Gas mileage is around 12MPG if I baby it. If I put my foot into it I will get 8-9MPG. The entire project took me around 2 months. I worked on it almost every day after work for a few hours and longer hours on the weekends. It was quite the experience and I learned a lot. The next V8 swap I do might be something more complicated like a GM engine.
Videos of my Jeep running below:
Update 01-06-17
Summer is over… I got 3,000 miles on the new motor with no real issues. I had a funny scraping noise from the underside which drove me nuts. It ended up being the fly wheel rubbing on the transmission covers. I adjusted them some and the noise went away.

No need to lengthen driveshafts if you use the right motor mounts. The AMC V8 (304, 360 or 401) should drop right in as a replacement to the 258 I6. One of the 6 cylinder motor mounts is actually the same. I believe it is the passenger side. The driver side needs a CJ mount kit, which includes bracket from frame to motor mount, and second bracket from motor mount to engine block. This approach leaves the rest of the driveline intact with no need to shift the tranny/T-case forward.
I took the original AMC 304 motor mounts out of the CJ7 I robbed it from. AMC never used the T4 tranny behind the V8 so I thought that was why the drive shafts were wrong lengths.
I just bought an 82cj7 with the 304 swap. The bottom radiator hose rubs on the steering shaft and is real close to the power steering belt. Did you ha e any issue in this area? Could you send me some pics of what/how your lower hose routes? You can text them to me or call. 812-821-8142. Thanks, Tony
I would have run the exhaust out in front of the rear tires because anything run out the rear is usually crushed if you mud bog rock crawl ect… also looks alot better.
I’m having a heck of a time with a 6 to 8 swap .I used the 8 cyl brackets on the frame, one side lines up the other is off by a inch . what might be the problem?
/
I have the same issue. What did you find as a solution.
thanks for the write up. Im in the middle of putting a 360 in. Im on the wiring now, and all the wires that go to nothing are bothering me. Im interested in how you cut the harness? I don’t know much about wiring, so feel a little over my head. do you have any info on what you cut out and how, and which wires you kept?
I took the flywheel off my 1977 AMC 360 engine and didn’t mark it for reinstallation. How do I determine where the counterweight on the flywheel goes in relation to the rotating assembly/crankshaft? New flywheel doesn’t have an alignment slot.
Where did you find the AMC 304 decal for the air intake? I love it but can’t find it online anywhere. I’m working on restoring a ‘78 CJ-7. Thanks